Jockstar Posted January 4, 2014 Share Posted January 4, 2014 Hi folks, I've taken ownership of a 2007 Ford Focus 1.8 tdci courtesy of the better half. She recently took delivery of a new 2.0 tdci Mondeo so this car is now going into my name, although I've been driving it a while. It's got 46-47k on the clock along with a few bashes (courtesy of the better half). I'm not going to pretend it's my dream car, but I love cars and a project is better than none at all. She's owned it from new so at least there's no nasty surprises in that respect. Here's a few of my previous projects : Supercharged 205 gti track car A couple of videos of the 205: http://s334.photobucket.com/user/Jockstar205gti/media/FILE0019.flv.html?sort=3&o=439 http://s334.photobucket.com/user/Jockstar205gti/media/NVEExport0001.mp4.html?sort=3&o=123 My Tommi Makkinen Evo VI My S2000 My Bora TDI Mk3 VR6 Anyway, back to the Focus! When the other half was driving the Focus, I didn't take a great deal to do with it other than to ensure it went to a Ford specialist (independent ex. Ford employee who set up his own garage) and has always been fitted with genuine Ford parts. I had a lot of stereo lying around from my previous cars, so I had an Alpine double din screen fitted along with Alpine Type R Speakers in the front and Type S Speakers in the rear. I also added a sub, 2 amps and a power cap. My friend, who used to work in an alloy wheel shop, came across a set of used mk3 Focus wheels which had been traded in. I managed to get the alloys, tyres, wheel nuts and lockers for £200 which I thought was pretty good. I didn't want to put wheels on the car that screamed aftermarket so I think they look quite at home on the mk2 : The car has gathered a few bashes over the years (hopefully the other half never gets to read this). So rather than splash cash on things I'd like but don't really need (trying to be grown up) I've just booked it in today for the end of January to get the paint work fixed. The car has also lost two of its mud flaps due to the harsh winter we had about 4 years ago. So I've been to Ford and bought a brand new set of flaps. Here's the damage : As you can see above, the car has been reversed into a bollard, driven front ways into a post and the front mud flap did a bit of last minute damage before saying goodbye. I don't see the point in doing other mods until the car is restored to a decent standard. The car has also suffered from a coolant leak, which I've been told is quite common. Seems to be an issue with the thermostat housing but that has been fixed. I also recently noticed the car was down on power and making a large HKS monster turbo wooshing noise. I had a look under the bonnet not expecting to find the cause, until I noticed a large split on a boost hose. It's the 90 degree bend hose that attaches to the throttle body. Under pressure it was just letting air escape. That's been fixed as well. The car does smoke a little when it's started from cold which it never used to do. The white/blue smoke that seems to be fairly common. It's absolutely perfect when the engine is warm so I'm not sure if it is needing a cleaning solution to be run through the engine. I got my mechanic to check the car but he can't find anything wrong with it. My future plans are to give the car a good clay bar / polish and get the interior clean (I did do this but it has reverted back to its original state - really hope the other half doesn't read that bit as well ;) ) and I've been looking into getting a custom exhaust, bluefin remap and possibly a front mounted larger intercooler. Having done a bit of digging, it would appear that there is a crossover between the engine I have and the ST, in respect of intercooler fitment. I'm not sure if there's a difference between the MK1 and MK2 ST though so I'm still looking into it. It's £300 for a ST intercooler, but some people buy a universal one for £100 and make it fit (I'm not that great when it comes to doing your own fabricating!). Anyway, the bodywork plans are : Front bumper respray with the plastic bits above the fog lamp surround colour coded Front wing resprayed Grill either colour coded or painted gloss black. I'm not a fan of the chrome Rear quarter fixed Rear bumper resprayed with horizontal plastic insert colour coded. I'll keep the plastic bumper extension non-colour coded like the front bumper, as you really need some plastic to break the car up Colour code the boot handle strip above the reg plate I'll update this with new pics when the bodywork is fixed. I'd also like to get new number plates as this can help tidy a car up a bit. Thanks for looking! Quote Link to comment Share on other sites More sharing options...
Jockstar Posted January 5, 2014 Author Share Posted January 5, 2014 Today's efforts included some Halfords engine oil (on offer at £10 for 4 litres, so handy for top ups), screen wash, axle stands and wheel chocks (exciting stuff!). Topped up the fluids and also purchased a Haynes manual Ever since I've used the car, I noticed that the cigarette lighter never worked which was a pain when I wanted to use my electric tyre compressor. I'm no electrical expert, so I was hoping it might be a blown fuse, otherwise I would be out of my depth. The Haynes manual stated that there are two fuse boxes, one located in the engine bay, the other hidden directly underneath the glove box in the passenger foot well. I had a look underneath the glove box and noticed two yellow cylinder shaped pieces of plastic. You squeeze each one together which releases its grip. Once the two are removed a piece of foam drops down with a fuse diagram : I could see that the picture of the cigarette in box F39 indicated the fuse I was looking for (20 amp). If you remove the fuse cover inside the engine bay (right hand side as you look at the engine from the front of the car next to the battery) there's a fuse removal tool on the reverse side of the lid. I plucked the fuse out which looked like this : You can just make out in the centre of the fuse that it has well and truly blown. I haven't got any fuses on me to replace it but as long as it doesn't continue to keep blowing, I might be back in business. Not the most interesting project update, but I know a bit more about my Focus today than I did yesterday so I still see this as progress :) Quote Link to comment Share on other sites More sharing options...
Jockstar Posted January 14, 2014 Author Share Posted January 14, 2014 Been stockpiling some parts before the car gets painted. I bought new Ford foglamp surrounds as one has a slight crease. There's no point in buying one as they'll end up being mis-matched with one being new and the other being weathered. I also purchased a cover for the cigarette lighter as the car didn't seem to have one and I managed to get a 5p wedged in by mistake! Don't want to blow the fuse again! I also purchased these: As can be seen below, they look a lot better than the original nicotine yellow reg. plate bulbs: And here's a couple of pics with both bulbs replaced: I have a Cree Q5 reverse light coming and I also bought new number plates to replace the worn looking ones on the car. Fresh plates always help make a car look better. That's all for today! Quote Link to comment Share on other sites More sharing options...
b4zz Posted January 15, 2014 Share Posted January 15, 2014 looking good and like the sound of the plans Quote Link to comment Share on other sites More sharing options...
Stoney871 Posted January 15, 2014 Share Posted January 15, 2014 The small touches are the best. Quote Link to comment Share on other sites More sharing options...
Jockstar Posted January 15, 2014 Author Share Posted January 15, 2014 Thanks folks. The next job is to get to the bottom of why my passenger side reg. bulb holder is corroding from water ingress. I have a new bulb holder from Ford: However, I need to start ripping the boot apart to see if I can find out what's going on. The driver's side bulb holder/lens is perfect with no corrosion. When the weather improves I'll have a look around to see what's what. Quote Link to comment Share on other sites More sharing options...
Stoney871 Posted January 16, 2014 Share Posted January 16, 2014 Are there plastic covers clipped over the back of the lights? If not then there should be. If you haven't then I can dig the part number out for you. I had to buy one when I got my car as I could see light bleeding up into the rear window at night and found one cover missing, also the light that was missing the cover had a light brown deposit on the inside of the lens. Quote Link to comment Share on other sites More sharing options...
Jockstar Posted January 16, 2014 Author Share Posted January 16, 2014 Hey Stoney! Yeah both covers are present and correct :) Quote Link to comment Share on other sites More sharing options...
Jockstar Posted January 18, 2014 Author Share Posted January 18, 2014 Still not had time to take the boot apart to sort the registration light rust issue. Away to Glasgow tonight to see Top Gear Live so next chance I'll have might be Sunday. These bulbs were waiting at the post office for me. I also got my replacement spoiler lens from Ford after they tried to supply me with the wrong one from a mk2.5! It comes with new bulbs and the bulb holder as well as a new seal. The guy in the dealership told me I'd only get the lens so not very accurate information from Ford: As you can see in the picture below, my existing spoiler lens foam seal has mould growing on it and is falling apart. The central white foam block that helps the spoiler lens sit snug is almost completely worn away on my existing spoiler lens: My original lens was also doing this: As you can see below, the Cree 501 led bulb that I bought is huge! No way it's going in the rear spoiler. You can just make out the other normal sized bulbs! The original spoiler lens foam block, or at least what is left of it: So out with the reverse light lens. Fairly easy to remove. Just get your head under the rear bumper and one plastic tab/clip releases it. The bulb has a simple twist fit. The hardest part of changing the bulb is getting your hand in to remove the bulb: Lens cover removed. You can see the tab: Bulb swapped: And a short video that I made so that I could check for certain the bulb was working. There was no one I could grab to stand at the back of the car! http://s334.photobucket.com/user/Jockstar205gti/media/IMG_10761_zpsfa917018.mp4.html?sort=3&o=8 I tried the Cree 501 in the front headlight of the car but it was very slightly too big to slide into the headlight. Glad I only bought one now. Not sure if I'll be able to use it at all! That's all for today. Quote Link to comment Share on other sites More sharing options...
b4zz Posted January 18, 2014 Share Posted January 18, 2014 liking the new bulb Quote Link to comment Share on other sites More sharing options...
Jockstar Posted January 19, 2014 Author Share Posted January 19, 2014 Thanks b4zz. Well the weather was dry today so decided to take the boot apart. Removed the two screws on the inner boot trim where the handles are. My dad removed the inner trim as I was too scared I'd break it! Came off ok without anything getting damaged thankfully. We then removed the 4 inner bolts holding the exterior plastic boot trim. It still wouldn't budge but I then realised there's more clips holding it on. This is what I found: All the clips were there as were the two seals for the registration plate lights. So nothing apparently amiss. You can see at the base of the threaded bar that it has been rusting. The other three threaded bars were fine: I also had this lurking behind the boot switch. Looks like the plastic trim has been rubbing the paint: And here's the old registration bulb holder. A tad rusty: So we've sealed it up as best we can so I'll just need to see what is going to happen next. I've also spotted the usual rust patch where I think the rear screen wash pipe is rubbing the top of the inside of the boot lid: I've cleaned the inside of the boot lid to get rid of the grime and mould. Maybe another job to add to the mounting paint work list! That's all for today. Quote Link to comment Share on other sites More sharing options...
Jockstar Posted January 25, 2014 Author Share Posted January 25, 2014 So more bulb action today. I bought these: Side light LED Bulbs are available here: http://www.alltronix.co.uk/index.php?main_page=product_info&products_id=211 My current dipped headlight bulbs are standard Halford no frill numbers so I was hoping I'd get an improvement. So sidelights before: And after: A big improvement and it wasn't even properly dark so I'm happy with that! Next onto the dipped headlights. Before: And after: The bulbs certainly seem to be much brighter considering that the wattage hasn't been upped from 55w (these bulbs are street legal). However, with them allegedly being 4000k, I was expecting an improvement in colour from the standard yellow shade. They don't seem any different to me. However, this might change when I switch them on in the dark. I'll be going out in the car tonight so at least I'll be able to see if they are brighter on the back roads. And I'll be dropping the car off tomorrow for paint so it's away on a little holiday! That's all for today. Quote Link to comment Share on other sites More sharing options...
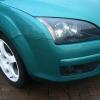
Jockstar Posted February 1, 2014 Author Share Posted February 1, 2014 Well the car is back from the body shop and I'm very happy with the results. It's a lot of nice little touches, so nothing in your face but the car looks so much tidier than before. Prior to me getting the car back, I came across these on Gumtree: I'd always wanted a set of Team Dynamics Pro Race 3 for my 205 track car, but they were a bit pricey. These ended up costing me £250, but they'd never been used from new (stored in a warehouse) and there was the added bonus of a fifth spare wheel. There's some storage marks, but nothing serious. They'd look nice in gunmetal, but at the moment I can't justify spending another £200 to change the colour so they'll stay white for now. These easily retail close to £1000 with tyres so they're worth £250 all day long. Got the tyres taken off the mk3 focus alloys and onto the pro race 3 and this is how it looks with the wheels and paint work: Bootlid handle colour coded, rear bumper re-painted including bumper strip, rear quarter fixed, new rear reg. plate with LED lights and rust inside boot fixed next to the rear washer pipe (armafend placed over repair to stop it rubbing again) Binned the registration plate bolts as they were past their best, replaced with new ones. Front bumper re-painted, bonnet re-painted to fix big rusty stone chip, new fog lamp surrounds, bumper strips above surrounds colour coded, new registration plate and grill painted gloss black: Marks on the front driver wing fixed: Mud-flaps are still to be fitted, although the guy who painted the car didn't want to fit the new set I bought with the car having just been painted. He has a love/hate relationship with them, as he thinks they can rub paint work and be a water trap. They do make the car look better in my opinion and prevent road rash, so I'll probably still fit them. So what do you guys think? 1 Quote Link to comment Share on other sites More sharing options...
Jockstar Posted February 10, 2014 Author Share Posted February 10, 2014 Well today's update is me being a numpty and more LED action. As you can see from the picture of the car above taken from the front, there were hefty shut line gaps between the bonnet and the headlights / grill. I thought this was because the bonnet had been re-painted along with the front bumper and it all hadn't been put together properly. Anyway, I was taking the interior light out to measure the festoon bulb length (42mm) and replacing the boot light with a LED. All of a sudden both lights stopped working. Fuse 80 under the glove box confirmed that a blown fuse was the cause. My intention was to fetch the fuse removal tool from the fuse box under the bonnet. I put my key in the grill to turn it to the left to pop the bonnet and nothing happened. I immediately assumed the worst having read about people being locked out of their Focus bonnets when the front end is tampered with. I ended up going to the body shop and we managed to remove the collet seal through the grill using welding wire. We then proceeded to try the screwdriver trick with no luck. It dawned on me on Saturday morning looking through various pictures of the Focus, that the shut lines on the car were well off. I contacted the guy who painted my car and he told me the bonnet was sprayed still bolted to the car and that the shut lines should be no different to how they were. Then a little light bulb appeared in my head. What if the body shop had left the bonnet on the safety catch. Feeling like a muppet, I went out to the car, inserted the key and turned it to the right. The bonnet then lifted up straight away (arrrrrrrrrrggggggggghhhhhhhhhh!!!). I then proceeded to the top of the grill to re-fit the rubber collet seal. At least my bonnet was working again, although I was a bit peefed that my bonnet could have ended up flipping into my face at 70mph.......guess I got lucky. Anyway, shut lines are perfect now (helps when you shut the bonnet properly). So this arrived today: Much whiter and brighter than the original. I also re-fitted my boot LED and replaced the 10 amp fuse that had blown. Everything works again: I phoned Team Dynamics today and ordered a set of centre caps for my wheels. I wanted to use the original Ford ones, but the 16" standard wheel centre caps are too big and the mk3 Focus alloy centre caps are too small! Still got the mudflaps to fit but the wing that wasn't painted has the beginnings of rust. I'd like to get it fixed prior to fitting them. Eibach springs are on the horizon as well to try and alleviate the 4x4 stance. Quote Link to comment Share on other sites More sharing options...
Jockstar Posted February 11, 2014 Author Share Posted February 11, 2014 Team Dynamics centre caps turned up today. I ordered them at 2pm and got them the next day so excellent service: Wheels look better without a gaping hole in the middle of them: Car battery is flat for some reason. I was going to head up to my folks to pick up some eBay dipped headlight, full beam and fog light bulbs but that's off the cards until I get the battery charged. I have some Cree Q5 fog light bulbs as well so I'll do some comparison photos between standard bulbs, Cree and eBay bulbs :) Quote Link to comment Share on other sites More sharing options...
Hassen Posted February 11, 2014 Share Posted February 11, 2014 Looking good there and the little touches are the ones that make the most difference I think. My favourite part on the car are the alloy wheels. A real bargain at that price and can't wait to see them in gunmetal grey. Best of luck with the build :) Quote Link to comment Share on other sites More sharing options...
Jockstar Posted February 12, 2014 Author Share Posted February 12, 2014 Thanks Hassen. Sometimes I look at them in white and think they look good. Other times I'm not so sure. But yeah, to find a set on Gumtree that are basically Focus specific for that price and to get 5 alloys instead of the usual 4 is an offer you don't see that often! Quote Link to comment Share on other sites More sharing options...
Hassen Posted February 12, 2014 Share Posted February 12, 2014 Definitely a bargain at that price. As for the change in colour, I was thinking about that while at work today. My two ideas are: 1. Get them powder coated. You would still end up saving money since you bought them cheaper. 2. My favourite: Get cans of Plastidip and do all four wheels. Cheaper, effective and completely reversible. Plus, with the new colours and metalisers, I am sure you will find something close to Gun Metal grey or some other cool colour. I am very tempted to do this to my own wheels and waiting for the summer time before doing anything. And yea, the white colour does look nice but I really think it's because of the unusual colour of your car :) Quote Link to comment Share on other sites More sharing options...
Jockstar Posted February 13, 2014 Author Share Posted February 13, 2014 Yeah I was never keen on the colour but now that the car looks a bit fresher, it's growing on me. I'd like to save the money I would have spent on powder coating and buy some Eibach springs instead :) Quote Link to comment Share on other sites More sharing options...
Hassen Posted February 13, 2014 Share Posted February 13, 2014 Eibach springs are a really good mod I think. Always wanted to get them for my car along with a full set of Bilstein shocks. There is a kit, B12 that comes with these springs and the Bilstein shocks. Having the alloys already would definitely make the car stand out once it's lowered :) Quote Link to comment Share on other sites More sharing options...
Jockstar Posted February 13, 2014 Author Share Posted February 13, 2014 Yeah I've seen the B12 kit but it's a lot of cash. I had those dampers on my 205 gti and they were good. I'll have to settle for the springs! Quote Link to comment Share on other sites More sharing options...
Jockstar Posted May 24, 2014 Author Share Posted May 24, 2014 This thread has been neglected for a bit! Not a great deal has been done to the car other than new dipped / full beam bulbs / fog light bulbs, full set of new Ford mudflaps fitted and the other front wing re-painted. I've just bought a set of AP coilovers today along with Eibach rear camber bolts. I'm not sure how much I'm going to lower the car but we'll see how it goes! Quote Link to comment Share on other sites More sharing options...
b4zz Posted May 25, 2014 Share Posted May 25, 2014 liking the new wheels fella and almost went for a set of these my self but ended up with a set of wolfrace 17s insted Quote Link to comment Share on other sites More sharing options...
Jockstar Posted June 14, 2014 Author Share Posted June 14, 2014 Well the AP coilovers finally turned up: I also needed some new back brakes as I'd been given an M.O.T advisory last year, meaning I really needed to get them off the car! I considered buying Ford parts, but it was going to be silly money. In the end, I opted for PAgid discs and pads from Euro Car Parts. £70 delivered to the door. Would have been over £100 from Ford. So I took my car to the garage this morning and got cracking! This is the mechanics car (Mk3 Golf VR6 turbo): Front suspension out: Back brakes getting renewed. I quite like the silver coating Pagid put on the discs: And some pictures of the finished article: Next on the agenda will be a re-map and a centre exit cat back 2.5" system when funds allow! I'm pretty happy with how it sits. The front can go down another 20mm and the rear can still go another 10mm without removing the spring cups. However, I like it as it is and it will settle a bit. Handling seems more precise! No rubbing and I can get over speed bumps with no scraping of the mudflaps so it's an ideal setup. It's lowered roughly 50mm. I'm also looking into a whiteline rear ARB so finish things off. 1 Quote Link to comment Share on other sites More sharing options...
Hassen Posted June 14, 2014 Share Posted June 14, 2014 Car looks really good. Lowered to just the right amount and looking menacing in a good way. I like the idea of the Whiteline ARB. Did my bit of research on it and best bang for the buck among the ARBs. How's the car settling in? I myself started saving for the B12 kit and the Whiteline ARB :) Quote Link to comment Share on other sites More sharing options...


Recommended Posts
Ford UK Shop
Sponsored Ad
Name: eBay
Ford Model: FordUK Shop
Ford Year: 2024
Latest Deals
Ford UK Shop for genuine Ford parts & accessoriesDisclaimer: As the club is an eBay Partner, The club may be compensated if you make a purchase via the club
Join the conversation
You can post now and register later. If you have an account, sign in now to post with your account.