sonic113 Posted September 6, 2014 Share Posted September 6, 2014 I'm in the middle of wiring a circuit to add cup holder lights following Pree's guide and some advice from Lenny but I was wondering a few things before I proceed any further. I'm installing an inline fuse and a on/off rocker switch. 1) Does a switch go on the positive or negative feed? I'm think Positive but just need a second opinion first. 2) Does an inline fuse go on positive or negative feed? Once again I'm think the positive feed but just would like to confirm this. 3) I am splicing into car dash lighting wiring so does the inline fuse holder go before the switch on the circuit or after the switch and before the LED strip? I have put together 2 examples to explain. Example 1 DASH WIRING ------------{INLINE FUSE HOLDER}--------------(SWITCH)--------------LED STRIP Example 2 DASH WIRING -------------(SWITCH)----------------{INLINE FUSE HOLDER}-------------LED STRIP. At a Guess I would say example 1 but again just need a second opinion. Thanks. Quote Link to comment Share on other sites More sharing options...
stef123 Posted September 6, 2014 Share Posted September 6, 2014 As far as dc circuits are concerned the switch and fuse should be on the positive side. Also, I would put the fuse in at the earliest point of the circuit where possible. so before your switch. What fuse rating are the dash lights running on? You might not bend to worry about a fuse. Quote Link to comment Share on other sites More sharing options...
sonic113 Posted September 6, 2014 Author Share Posted September 6, 2014 I'm not sure what's fuse the interior dash lights run on but I was planning on using a 3amp fuse on my circuit I am adding in as pree's guide recommends. The new circuit will have a 3amp fuse ,a rocker switch , 3 led strips (3 LEDs on each strip) two strips are for cupholder and one for bird bath. On all conditions I will be stripping the wires ,twisting them soldering them and then heat shrinking them as I feel this is good practice and will provide a secure connection throughout the circuit. I was also thinking about holding the led strips to the cupholder usinghot glue instead of insulating tape as it may be a more tidy and practical option. I'm open to any recommendations so feel free to give any idea's. Thanks Quote Link to comment Share on other sites More sharing options...
troy45 Posted September 6, 2014 Share Posted September 6, 2014 I'd say the dash lights are fused at 10A, that 's the value of fuse I can see on the schematic feeding into the dimmer switch. For the layout of your circuit, definitely put the fuse first, then the switch, then the LED's - that way you're maximising the amount of your circuit which is protected by the fuse. With the LED strips I've used so far the double-sided tape has worked fine so I'd say you'll be ok using this - with tape you should get good contact if you're attaching between 2 flat surfaces. Also gives you a bit of scope for re-positioning if needed before you fully stick it down. 1 Quote Link to comment Share on other sites More sharing options...
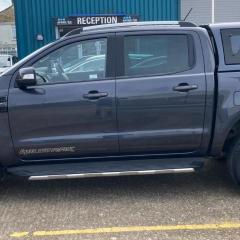
sonic113 Posted September 8, 2014 Author Share Posted September 8, 2014 Ok I finally got my cup holder LED'S installed. Here are some pics: 1) Removing the center console. 2) Installing the LED'S Here I put together a small circuit using a 9v battery to get an idea where to place the LED'S. I had to move the chrome trim for better access. 3) Drilling the Holes. I decided to use 4 out of the 6 LED's as I thought it give the cup holder a more even glow. so I tried to position them directly across from one another and around the same distance from top to bottom. 4) Attaching LED Stripes. I attached the LED's USING HOT GLUE to give them a firm hold. I en used solder and heat shrink to give a better connection and a more firm hold on the joints. 5) The switch I used the same method when wiring up the switch. 6) The finished product Here is the whole lot installed and working via a small battery and switch as a test. You can see the nice even glow the cup holder has now using 4 LED'S. 7) Car installation I have all finished and installed into the car but the phone battery died before I got any final pics taken but here are some I did get. I installed the switch inside the OBD port (Thanks to Lenny for that idea) I also crimped and heat wrapped a connection to earth the new circuit to the handbrake bolt. As well as this I ran a short lead from the Illumination wire of the rear demister switch to the drivers foot well left plastic panel where behind this I added an inline fuse (3amp) and this is where the other wires from the switch also connect. I decided on this location for easy access in case the fuse need to be replaced. I also added clear silicone so no spillages can damage the circuit. Switch Earth Point Under handbrake bolt also thought I would take this opportunity to show a pic of my new chrome vet surrounds installed. :) when wiring in the new cicuit I came across these wired taped up in the loom behind the Demister switch pannel. I think that my 12v power socket is spliced of these as they are same color and thickness of wires but does anybody know what they are for? Here the are. Thanks for looking at this thread and big shout out to Pree for his guide and Lenny for all the help and advice. I will be ordering more LED's for the birdbath Mod as I ran out. Thanks Quote Link to comment Share on other sites More sharing options...
Lenny Posted September 8, 2014 Share Posted September 8, 2014 Looks good mate :) 1 Quote Link to comment Share on other sites More sharing options...
Dee_82 Posted September 8, 2014 Share Posted September 8, 2014 is one of those not the 12v socket connector that is fitted on some models, where your garage door storage box is just now? Quote Link to comment Share on other sites More sharing options...
sonic113 Posted September 8, 2014 Author Share Posted September 8, 2014 is one of those not the 12v socket connector that is fitted on some models, where your garage door storage box is just now? Yes it must be. I don't have a 12v power inside the garage door pocket mine is beside the cupholders. It may have been taped up as the pre facelift probably uses the same wiring loom and on the facelift they just moved the 12v socket. Quote Link to comment Share on other sites More sharing options...
stevegtuk Posted September 8, 2014 Share Posted September 8, 2014 I would say go with example 1... although I have, in one or two instances had to use the switch on the negative side, which has still worked, providing they leds have their own separate negative/earth. Quote Link to comment Share on other sites More sharing options...
sonic113 Posted September 8, 2014 Author Share Posted September 8, 2014 I would say go with example 1... although I have, in one or two instances had to use the switch on the negative side, which has still worked, providing they leds have their own separate negative/earth. Thanks for reply mate. I have already went with option 1 and it turned out to be 100%. Very Pleased with final installation. Quote Link to comment Share on other sites More sharing options...


Recommended Posts
Ford UK Shop
Sponsored Ad
Name: eBay
Ford Model: FordUK Shop
Ford Year: 2024
Latest Deals
Ford UK Shop for genuine Ford parts & accessoriesDisclaimer: As the club is an eBay Partner, The club may be compensated if you make a purchase via the club
Join the conversation
You can post now and register later. If you have an account, sign in now to post with your account.