Scott Groves Posted October 19, 2015 Share Posted October 19, 2015 So last Friday I purchased my first Ford. A Focus Zetec 1.6 06 reg. Great condition, full service history and about 75000 miles on the clock. I could not resist upgrading my much loved Citroen Saxo Vtr 1.6 8 valve to this beauty. As far as I am aware its standard throughout. Looking to keep things subtle as its going to be our family car/ my fun car :D . 1 Quote Link to comment Share on other sites More sharing options...
Scott Groves Posted October 19, 2015 Author Share Posted October 19, 2015 Managed to give the inside a good clean as i assume the old owners had dogs as the boot was still hairy :( and decided to remove the zetec badge using a hair dryer and card as advised by other members. Pleased with the outcome although barely noticeable to some. Now to hope for some good weather to get out there and wash/ wax. Quote Link to comment Share on other sites More sharing options...
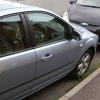
Scott Groves Posted October 21, 2015 Author Share Posted October 21, 2015 Only a small update, i have never liked large aerials but at the same point when looking for a new small one I didnt want to sacrifice the radio reception until I get time to transfer my Alpine ipod headunit from my old car. New aerial looks good imo and reception is spot on still. 2 Quote Link to comment Share on other sites More sharing options...
Focu5 Posted October 23, 2015 Share Posted October 23, 2015 Your lucky you get signal with that aerial, my reception is terrible with a normal one. Like you i also need to keep any mods subtle so the wife doesn't know how much im spending on it. haha! What else you got planned? 3 Quote Link to comment Share on other sites More sharing options...
Lenny Posted October 24, 2015 Share Posted October 24, 2015 So last Friday I purchased my first Ford. A Focus Zetec 1.6 06 reg. Great condition, full service history and about 75000 miles on the clock. I could not resist upgrading my much loved Citroen Saxo Vtr 1.6 8 valve to this beauty. As far as I am aware its standard throughout. Looking to keep things subtle as its going to be our family car/ my fun car :D . 2015-10-19 15.44.56 (4).jpg 2015-10-21 15.09.00 (2).jpg Welcome to the forums, excellent choice in vehicle 👌 Some genuine mud flaps look good and protect body, Team Heko wind reflectors also look good and reduce wind noise on rear passengers, I've created over thirty Guides on subtle modifications to the focus across past five years you may be interested in viewing here: http://www.fordownersclub.com/forums/topic/68214-full-list-lennys-guides/ Been on here over five years now, being a family man of three now myself I don't get as much time to be on as I used too and my build is more/less complete so I don't have much reason 😕 my guides include rear seat protection cover, front and rear footwell lighting which is great for finding dropped toys in the dark, 10" HD rear roof monitor with DVD and DVD tuner great for entertainment on long journeys, Additional boot light, dual reverse lighting, Ford logo puddle lighting the list goes on. All nice subtle mods, any questions feel free to email via address in signature below for response within 24hrs as I may not be on here for days apart. Quote Link to comment Share on other sites More sharing options...
Scott Groves Posted October 24, 2015 Author Share Posted October 24, 2015 Thanks for the replies. Nice to feel welcome. At the moment im selling off some parts from my old Saxo to get the fees to transfer over my private reg and removing the Alpine ipod headunit and Vibe space sub and amp with all its wiring to transfer into the focus when i buy the single din fascia and steering control adapter for my headunit. Thanks Lenny for the links im childless today so will certainly sit and have a read 1 Quote Link to comment Share on other sites More sharing options...
Scott Groves Posted October 24, 2015 Author Share Posted October 24, 2015 So I managed to get out yesterday and give the car its first wash. Didn't want to go overboard just wanted to freshen it up and see if it required a clay or polish to plan for a detail in the coming weeks. I usually use a combination of both Dodo Juice and Autoglym products. So today it was a wash with Supernatural shampoo followed by a coat of Purple Haze and some Clearly Menthol for the windows and sills Pleased with the outcome though and the paint is in better condition than i expected with only some minor marks that touch wood should lessen or disappear through polishing 1 Quote Link to comment Share on other sites More sharing options...
Scott Groves Posted October 24, 2015 Author Share Posted October 24, 2015 Does anyone have a guide with plenty of pictures for the best way to run the cables to the rear of the vehicle. I know how to wire it just not the best way on a focus. Many thanks in advance 1 Quote Link to comment Share on other sites More sharing options...
Lenny Posted October 24, 2015 Share Posted October 24, 2015 Does anyone have a guide with plenty of pictures for the best way to run the cables to the rear of the vehicle. I know how to wire it just not the best way on a focus. Many thanks in advanceI've done this in my build thread mate, I'll find the correct page it's on and insert a link here; The focus doesn't have a cavity in the door sills like a Saxo or many other vehicles the cavity in the focus is actually under the seats and carpet, Not a huge job to remove just need two torx bits available from Halfords need a TX40 and a TX50 bit. I've routed power cables for amplifiers in boot compartment under the floor carpet along side the factory loom, And I've routed the RCA cables up the A pillar and along the roof lining in to the boot compartment to avoid static interference. All took half a day instead of half an hour but it's well worth taking the time for a factory finish. I've used vibe 4AWG amplifier install kits from Halfords but needed to purchase a 7 metre length of 4AWG power cables from RadioWorld to snugly fit the focus going through grommet at rear of glovebox in to the battery in the engine bay. In this page of the build thread I've links to cable supplier as well as details of Torx size to remove seats http://www.fordownersclub.com/forums/topic/41443-taking-oval-to-blue-horizon-lennys-build-thread-2010-2015/page-78 In this page of the build i discuss where i first routed power cables along the roof lining but considering they were obstructing the curtain airbags I later lifted up the carpet link: http://www.fordownersclub.com/forums/topic/41443-taking-oval-to-blue-horizon-lennys-build-thread-2010-2015/page-79 If considering fitting rear footwell lighting; this is a good time to install them as well when carpet is lifted. You may also like to view my custom sub enclosure and amp panel install guide Link: http://www.fordownersclub.com/forums/topic/63695-guide-fitting-custom-amp-sub-enclosure-mk2-mk25-focus-2005-2011/ 3 Quote Link to comment Share on other sites More sharing options...
Scott Groves Posted October 25, 2015 Author Share Posted October 25, 2015 Thanks Lenny that was perfect and really cleared some bits up for me. Looking forward to stripping the old car tomorrow and getting to grips with the new install. Could you confirm if this fascia will be fine please as there seems so many with minor differences http://www.ebay.co.uk/itm/160908283987?_trksid=p2055119.m1438.l2649&ssPageName=STRK%3AMEBIDX%3AIT I know ill also require a separate lead to ensure that the steering wheel controls remain functional 1 Quote Link to comment Share on other sites More sharing options...
Lenny Posted October 25, 2015 Share Posted October 25, 2015 Thanks Lenny that was perfect and really cleared some bits up for me. Looking forward to stripping the old car tomorrow and getting to grips with the new install. Could you confirm if the fascia will be fine please as there seems so many with minor differences http://www.ebay.co.uk/itm/160908283987?_trksid=p2055119.m1438.l2649&ssPageName=STRK:MEBIDX:IT I know ill also require a separate lead to ensure that the steering wheel controls remain functional no problem mate, Happy to share information where possible 👍 the fascia kit will fit 100% and as you've already said; will need additional steering adapter to cover the specific brand of headunit. 2 Quote Link to comment Share on other sites More sharing options...
chrisroberson99 Posted October 25, 2015 Share Posted October 25, 2015 Welcome. Car looks good. Same age and spec as my Grandma's. :) 1 Quote Link to comment Share on other sites More sharing options...
Scott Groves Posted October 29, 2015 Author Share Posted October 29, 2015 So the fitting kit for my stereo has been ordered and should be here tomorrow. Can anybody send me a link to the correct patch lead o that ill be able to keep the steering wheel controls. Ive looked at a few but obviously want to ensure its the correct one....Thanks 1 Quote Link to comment Share on other sites More sharing options...
Lenny Posted October 29, 2015 Share Posted October 29, 2015 So the fitting kit for my stereo has been ordered and should be here tomorrow. Can anybody send me a link to the correct patch lead o that ill be able to keep the steering wheel controls. Ive looked at a few but obviously want to ensure its the correct one....Thankshere's the kit mate, Just select "Alpine" in list before purchase link: https://www.dynamicsounds.co.uk/connects2-ctsfo003-ford-mondeo-s-max-focus-stalk-steering-control-adaptor.html 1 Quote Link to comment Share on other sites More sharing options...
Lenny Posted October 29, 2015 Share Posted October 29, 2015 Double Post Quote Link to comment Share on other sites More sharing options...
Scott Groves Posted October 29, 2015 Author Share Posted October 29, 2015 Thanks mate and alpine is available. So guessing the large end goes to the cars wiring loom, small blocks to the alpine headunit but what about the rectangle shaped piece? Ill uplload a picture of the rear oof the headunit once my phone charges to make it a bit clearer 1 Quote Link to comment Share on other sites More sharing options...
Scott Groves Posted October 29, 2015 Author Share Posted October 29, 2015 So this is the rear of the Alpine headunit the wires you see are all marked as follows swrc remote1, swrc remote2 and swrc ground 1 Quote Link to comment Share on other sites More sharing options...
Lenny Posted October 29, 2015 Share Posted October 29, 2015 2015-10-29 20.27.46 (2).jpg So this is the rear of the Alpine headunit the wires you see are all marked as follows swrc remote1, swrc remote2 and swrc ground Nice headunit there mate, Has three sets of pre-out RCA good for an external 5 channel amplifier or two amps one mono and 4 channel SWRC means Sub Whoofer Remote Control it's a power line which sends a small signal current to wake up the amplifier when you turn on the headunit you only need this when fitting external amplifier or amplifiers. Anyway; The kit will have two separate items. 1 cable which has a socket the same as the rear of factory headunit to plug in to the factory loom Then On the other end of this cable is male iso plugs You should currently have a loom with your Alpine headunit that plugs in to rear of the Alpine headunit and has female iso connection on the end. This all plugs together The second item in the kit; Is the steering stalk adaptor. This is a small black box, plug in the Ford loom plug in to the box, Then on the other side is a connection to plug in to your Alpine headunit allowing the steering stalk to function. that's all done. I have alot of cables at the rear of my double din 13 RCA's 2 usb, 2 phono, and usual power cables which resulted in me using the Haynes manual to hard wire the pioneer loom to the factory loom using crimp spade connections this eliminates the iso sockets reducing bulk at the rear of the headunit. but in fitting a single din should be fine. 1 Quote Link to comment Share on other sites More sharing options...
Scott Groves Posted October 30, 2015 Author Share Posted October 30, 2015 Always liked this headunit as its solely for ipod so the connection and quality of playback is brilliant. I use to run as you said a mono amplifier for my Vibe Space sub and a four channel amp for the Speakers in my saxo. Anyway the single din fitting kit arrived today and everything went smoothly except for the fact i had no sound until i activated steering wheel control on the headunit.....any solutions or explanations as to why greatly appreciated. Managed to run the ipod cable round and into the rear of the glovebox to keep everything hidden/ secure and sounds brilliant. Here is the finished headunit as it stands Next in line is to sort through and clean up the bag of vibe cables ive got ready to install the Vibe blackbox bass mono amp and power cap to run the Vibe Space amp 1 Quote Link to comment Share on other sites More sharing options...
Lenny Posted October 30, 2015 Share Posted October 30, 2015 Always liked this headunit as its solely for ipod so the connection and quality of playback is brilliant. I use to run as you said a mono amplifier for my Vibe Space sub and a four channel amp for the speakers in my saxo. Anyway the single din fitting kit arrived today and everything went smoothly except for the fact i had no sound until i activated steering wheel control on the headunit.....any solutions or explanations as to why greatly appreciated. Managed to run the ipod cable round and into the rear of the glovebox to keep everything hidden/ secure and sounds brilliant. Here is the finished headunit as it stands 2015-10-30 16.28.20 (2).jpg Next in line is to sort through and clean up the bag of vibe cables ive got ready to install the Vibe blackbox bass mono amp and power cap to run the Vibe Space amp Can't explain why sound wasn't working until steering stalk was activated.Bit wierd that one. Looks great fitted, And very tidy with iPod connection in the glovebox. the underside of the plastic boot panels on either side are great for mounting capacitor, I had DMB Graphics print me a redbull can decal and fitted it to a Connects2 1.0 Fared Capacitor mounted to underside of boot panel The way I measured the area for decal, Is wrapping A4 page around capacitor, Marking joint line where ends meet. Cut sheet Put sheet flat on table to obtain height and width. I've also created guide on building a custom fit amplifier panel if interested to view Link: http://www.fordownersclub.com/forums/topic/63695-guide-fitting-custom-amp-sub-enclosure-mk2-mk25-focus-2005-2011/ 1 Quote Link to comment Share on other sites More sharing options...
Scott Groves Posted November 2, 2015 Author Share Posted November 2, 2015 So the wires are sorted and ready for installation. RCA and remote down the drivers side/ under seat and power cable down/ under passenger seat. Quick bit of advice if anyone has it do i need to remove the battery and box to see the grommet for the power cable to go through as ive located it behind the glove box but cant see the point of entry from under the bonnet....thanks in advance 1 Quote Link to comment Share on other sites More sharing options...
Lenny Posted November 2, 2015 Share Posted November 2, 2015 So the wires are sorted and ready for installation. RCA and remote down the drivers side/ under seat and power cable down/ under passenger seat. Quick bit of advice if anyone has it do i need to remove the battery and box to see the grommet for the power cable to go through as ive located it behind the glove box but cant see the point of entry from under the bonnet....thanks in advanceyeah, Gotta remove air box lid and filter, Then front lifts off battery box, Unbolt battery bar, Disconnect and slide out battery, Remove bolts from base of battery box to remove it. In order to route the 4AWG cable through your going to need to drill a hole in the rubber and wrap tight with pvc tape when through 2 Quote Link to comment Share on other sites More sharing options...
Scott Groves Posted November 3, 2015 Author Share Posted November 3, 2015 god that rubber is hard to move 2 Quote Link to comment Share on other sites More sharing options...
Lenny Posted November 3, 2015 Share Posted November 3, 2015 god that rubber is hard to move she's tight 🙊squeeze it from outside and gently pull towards you. I used dremil to drill hole in it close to above existing cables taking great care not to damage the loom. Drilling created alot of smoke from burning rubber but got there in the end. Is possible mate just gotta be persistent. maybe run two in now for future reference 1 Quote Link to comment Share on other sites More sharing options...
GingerFlame Posted November 3, 2015 Share Posted November 3, 2015 she's tight squeeze it from outside and gently pull towards you. I used dremil to drill hole in it close to above existing cables taking great care not to damage the loom. Drilling created alot of smoke from burning rubber but got there in the end. Is possible mate just gotta be persistent. maybe run two in now for future reference I almost damaged the loom drilling the first car, so on the second I drilled parts of the firewall, fitted grommets and ran the cables separately :) 2 Quote Link to comment Share on other sites More sharing options...


Recommended Posts
Ford UK Shop
Sponsored Ad
Name: eBay
Ford Model: FordUK Shop
Ford Year: 2024
Latest Deals
Ford UK Shop for genuine Ford parts & accessoriesDisclaimer: As the club is an eBay Partner, The club may be compensated if you make a purchase via the club
Join the conversation
You can post now and register later. If you have an account, sign in now to post with your account.