HenryV Posted September 22, 2018 Share Posted September 22, 2018 Hi folks, Please could you advise me how to get the big multi pin connector off the ABS module without removing the module? Is it just a case of brute force or am I missing something? I've managed to lift up the wiring cover flap on the connector but can't budge the connector itself. My ABS light is permanently on. My OBD scanner tells me that the signal from the front offside speed sensor is missing. I've replaced the sensor but the light is still on and my OBD reader gives me the same fault. I want to check for continuity between the module and the sensor. I don't think the module has failed because I'm not getting any other warning lights on the dash or related faults. Regards, H.. Quote Link to comment Share on other sites More sharing options...
iantt Posted September 22, 2018 Share Posted September 22, 2018 most ford abs module connectors are removed by squeazing the connector cover locking tangs inwards then pulling the cover upwards. this unlocks the connector from the module 1 Quote Link to comment Share on other sites More sharing options...
HenryV Posted September 22, 2018 Author Share Posted September 22, 2018 Thanks Ian, I've squeezed the tangs and lifted the cover but I still can't seem to get the plug off the module. My connector does have the same cover as your picture . Quote Link to comment Share on other sites More sharing options...
HenryV Posted September 22, 2018 Author Share Posted September 22, 2018 By the way, After doing a bit more research, I reckon I've probably got a failed ABS module. I'm going to check the harness for continuity to the sensor first and if that's good, then it looks like the dreaded ABS module failure. This may yet turn into a biggish job? Quote Link to comment Share on other sites More sharing options...
HenryV Posted September 27, 2018 Author Share Posted September 27, 2018 Here's an update; To cut a long story short, I'd managed to break the cover/lever on the ABS multiplug. Luckily, I've managed to buy a replacement cover/lever from a breaker on 'fleabay'. I'll try to give an explanation and show some pics of how this plug works to help others who get stuck with it in the future. Broken cover; Replacement on it's way; The multiplug is in a very awkward spot and it's hard to determine how it functions. It's also very difficult to photograph but I gave it a go; The cover has two pinch levers that need to be squeezed to enable it to be pivoted/lifted away from the plug body (see above pics). The cover, when lifted, pivots the two round pins around radial slots in each side of the plug body. The plug body has a plastic 'slide plate' at either side with a slot for the lever/cover round pin. One 'slide plate' is beige in colour and one is blue. When the cover is down the slide plates are pushed upwards to engage/lock the multiplug body onto the studs on the module side of the connection; When it is lifted, the plates are pushed downwards to disengage from the studs. Here the plates are down to disengage the plug; On this 'fleabay' pic, the plug is attached and the plates are in the up/lock position; In my case, the plates were jammed/ceased in position. I'd advise anybody who tries to remove this type of plug to give the plate slots a good squirt with WD40 and to gently coax the plates up and down using the lever/cover and maybe a small screwdriver to tap the plates down enough times to free up the mechanism. All so easy with hindsight eh? H.. 1 Quote Link to comment Share on other sites More sharing options...
HenryV Posted September 27, 2018 Author Share Posted September 27, 2018 I managed to check the continuity between the front offside wheel sensor and the harness multiplug by shorting out the female sensor plug and metering the two corresponding pins in the harness multiplug. All was good. I've now decided to remove the ABS module and to send it to BBA Reman for refurb. Car is now off road and I'm back on the CBR600F (Bes, as I call her). Whilst the unit is away I'm intending to replace the two front brake hoses which are in poor condition. £24 from a local parts store; If all goes well, I've asked my bruv if he'll give me a hand bleeding the brakes using Forscan. I'm not at all confident about this, so I may be asking for advice along the way. H.. Quote Link to comment Share on other sites More sharing options...
HenryV Posted September 27, 2018 Author Share Posted September 27, 2018 I drained the brake fluid reservoir and started removing the ABS module; The connectors on this module need a suitable 11mm wrench/spanner and a 13mm wrench/spanner. I'm struggling to budge the front left 11mm fastener, so I've postponed the job whilst I wait for my posh Laser spanners to arrive in the post. H.. Quote Link to comment Share on other sites More sharing options...
iantt Posted September 27, 2018 Share Posted September 27, 2018 brake pipe spanners make easy work of them. Quote Link to comment Share on other sites More sharing options...
HenryV Posted September 29, 2018 Author Share Posted September 29, 2018 Update; Some brake line spanners arrived in the post today; I also ordered two Laser ratchet brake line spanners (11mm & 13mm) that would've made the job a whole lot easier but they didn't arrive today, so I got by with these. I manage to get the module off the car; I've highlighted the part No; ...and referenced it with the BBA Reman website, which identifies the unit as an ATE MK70, which they offer to repair for £159+VAT (Ouch!); I've packed it up and will get Reman to collect it early next week; I also managed to replace the front brake hoses today. Tomorrow, I plan to make sure all the bleed nipples aren't ceased and to see if any other brake parts need replacing whilst the ABS module is off on holiday. I'll update when I've more news, H.. Quote Link to comment Share on other sites More sharing options...
HenryV Posted October 14, 2018 Author Share Posted October 14, 2018 Here's an update folks: I haven't given up yet but I'm still really struggling with this issue and would appreciate any constructive advice. Admittedly, this job hasn't been my 'finest hour' but I'll give a 'warts and all' update so that others might learn from my mistakes. I replaced the broken cover lever with the one from the breakers whilst I awaited news from BBA Reman; I soon received a phone call from BBA Reman to inform me that they couldn't find anything whatsoever wrong/faulty with my ABS module. I must say at this point that they were very professional and very fast. I also accepted their findings. They suggested that my fault may be due to me replacing the wheel sensor with an aftermarket sensor or maybe the bearing(s). Also, they refunded my payment, less a £35 test fee. Fair enough. More follows.. Quote Link to comment Share on other sites More sharing options...
HenryV Posted October 14, 2018 Author Share Posted October 14, 2018 ...Soon after speaking to the guy at Reman, I realised that I'd slipped up with my fault finding procedure; It hadn't dawned on me that the front sensors are interchangeable and that I could've tried swapping the sensors over to see if the wheel sensor fault moved from the right wheel to the left. The module soon arrived back from Reman, so I set about rebuilding/refurbing the brake system. Then I got my bruv to help me manually bleed the brakes. I'm still hoping to do a Forscan service bleed eventually. I swapped the original front wheel sensors over and cleared the original fault code using my OBD reader. I set off in the car and as expected, soon saw the ABS warning light come back on. I again read the fault with my OBD reader and indeed the fault was now a 'Front LEFT wheel sensor signal' fault! At this point I thought I'd nailed the issue down to needing a genuine Ford replacement sensor. Next day, I set off on a 'scrapyard challenge' looking for a replacement Ford sensor. I found a breakers yard with a newer, lower mileage Fiesta in. I stripped off the sensor (appeared to be in good nick) and the guy let me have it for a Tenner. I got home and put the 'new' sensor on the front left and set off in the car. The ABS light went OUT!... ...Only to come back on after 20 seconds or so. I again plug in my OBD reader and get C1142 'Front Right Tone Ring Tooth Missing' fault! More to come... 1 Quote Link to comment Share on other sites More sharing options...
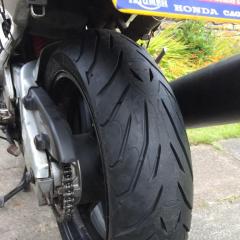
HenryV Posted October 14, 2018 Author Share Posted October 14, 2018 So I've been struggling to think of what to try next. As I understand it my front bearings are the 'alternate magnet' type and there isn't any toothed tone ring. However, I've started a new chain of thought; When I was searching for a replacement sensor, I noticed all the pictures of the sensors had a flat bottom edge. Here's an example; The replacement I got from the breakers was likewise; My original two sensors seem to have a radius/arch worn into them; The Ford part No. for these sensors is 1151951 by the way. Could it be that my front wheel bearings are indeed getting worn and that they're catching/wearing the sensors? The car has now done 104 000 miles. I can't seem to detect any obvious signs of bearing fatigue though. Any thoughts? H.. 1 Quote Link to comment Share on other sites More sharing options...
HenryV Posted October 14, 2018 Author Share Posted October 14, 2018 ...My next plan is to swap the front sensors over again and see if the same fault code persists. I'll update when I get any more info. H.. Quote Link to comment Share on other sites More sharing options...
HenryV Posted October 20, 2018 Author Share Posted October 20, 2018 I've now got this job sorted after spending a lot of time working out what was happening. I did indeed swap the front sensors over again, expecting to see the same fault code on my OBD reader. When I swapped them and cleared the fault code, I drove off fully expecting to see the ABS light return. It didn't and it hasn't since! After doing some research, I found that the tip of the sensor isn't the surface that reads the magnetic signal. The signal is read from the surface highlighted in the pic below; It reads the signal from the 'side wall' of the bearing as shown below; It appears that in my case, the tip of the front offside sensor was catching/rubbing on something. Maybe the drive shafts have a build up of rust? When I swapped them, this resulted in the 'well worn' and thus shorter nearside sensor being on the offside and clearing the rust/obstacle and not being disturbed. This is only my theory by the way. The final job was to use Forscan to 'service bleed' the ABS system with the assistance of my bruv. On the MK6 Fiesta with hindsight, the job would be easiest with all four wheels off the car. Forscan bleeds the front brakes first, Then the rear brakes, Then the front again, Then the rear again. We started with the front end up, then had to move my trolley jacks to the rear, then back to the front.... Next time, I'll lift the whole car. Lesson learned! There's a lot of brake pedal pushing along the way too! Here's a quick clip of us completing the process and the laptop lists each step along the way; Brakes are fine now (fingers crossed). Best regards, H. Quote Link to comment Share on other sites More sharing options...
HenryV Posted October 30, 2018 Author Share Posted October 30, 2018 I've now done another 400 Miles and still no ABS light! H.. 1 Quote Link to comment Share on other sites More sharing options...
HenryV Posted March 30, 2019 Author Share Posted March 30, 2019 The bloomin' ABS light keeps coming on again! Got to be the bearing I reckon. I'm hoping to have a go at it this weekend. I've already bought two bearings from 'Fleabay'. Fault reader indicates front offside issue, so I'm hoping to find time to change the bearing this weekend. I might actually do both the O/S and N/S. H.. Quote Link to comment Share on other sites More sharing options...
stef123 Posted March 30, 2019 Share Posted March 30, 2019 Done loads of bearings due to abs faults. Usually stick the scope on them and swap the sensors over to verify if required. Just done 2 bearings on an r26 Megane, one side had a faulty bearing/tone ring the other had a faulty sensor lol. Quote Link to comment Share on other sites More sharing options...
Bobr Posted March 30, 2019 Share Posted March 30, 2019 Thanks for all the info Henry. Quote Link to comment Share on other sites More sharing options...
HenryV Posted April 10, 2019 Author Share Posted April 10, 2019 I've now changed both wheel bearings folks. What a blooming job! My code reader was reading two faults: 1 Bearing issue 2 No signal from front o/s sensor After replacing the bearings I got one reading: 1 No signal from front o/s sensor I swapped the o/s and n/s sensors round.. ..and the reader said, 1 No signal from front n/s sensor! Surely, I've now got a duff sensor again? This job is now draining my will to battle on. I've ordered another replacement genuine used/2nd hand sensor from 'Fleabay' which I hope to fit this coming weekend. If that doesn't put the matter to bed I'm lost. If the OBD reader indicates that the fault moves from o/s to n/s when I swap the sensor from the o/s to the n/s then surely the sensor is duff? Surely?? I also, along the way had to replace the lower arm ball joints. Both had perished dust boots, split around the seam. Another pain in the ar$e job! MOT coming round soon too :-( As usual, any advice will be appreciated. Here's plenty of pics but no running commentary this time sorry; Anyone spotted revised 'Cranbolt Henry'? ;-) Quote Link to comment Share on other sites More sharing options...
HenryV Posted April 10, 2019 Author Share Posted April 10, 2019 By the way folks, I followed Haynes instruction whilst tackling the bearing job; The front hub nut on my car is definitely NOT to be tightened to 290 NM !!! Ford says 100 NM With hindsight, I should have cross referenced Ford/Haynes along the way. Definitely NOT my 'finest hour'. I stripped a hub nut by following Haynes. Of course, there's another on the way from 'Fleabay' !! My advice to DIY mechanics; Visit workshop-manuals dotcom for Ford instructions and always take Haynes with a pinch of salt! Regards, H.. Quote Link to comment Share on other sites More sharing options...
HenryV Posted April 11, 2019 Author Share Posted April 11, 2019 Hi again folks, The used genuine Ford sensor arrived today from Fleabay/breakers. I swapped it with the useless after market sensor that's never worked and... BINGO!!! The ABS light went out just after setting off. 108, 300 Miles now. Bye for now, H.. Quote Link to comment Share on other sites More sharing options...
iantt Posted April 11, 2019 Share Posted April 11, 2019 Ref the hub but torque, where did you see 100nm. Etis says 290nm. 1 Quote Link to comment Share on other sites More sharing options...
iantt Posted April 11, 2019 Share Posted April 11, 2019 And autodata 1 Quote Link to comment Share on other sites More sharing options...
stef123 Posted April 11, 2019 Share Posted April 11, 2019 Yup was gonna reply and say I have just done one recently and it was 270 or 290nm but 290nm it is lol. 2 Quote Link to comment Share on other sites More sharing options...
HenryV Posted April 12, 2019 Author Share Posted April 12, 2019 Thanks Ian & Stef, I highly respect your input to my threads. I've never been one for arguing anything. I do love to debate things though; Please give me your views on this subject because I would like to get to some sort of understanding. I honestly don't believe anyone is wrong here. I have now got five different hub nut torque instructions for the MK5/6 Fiesta (mine was built in 2005 and registered in 2006): 1. IanTT. Etis 290 NM 2. IanTT. Autodata 290 NM 3. Haynes. 290 NM 4. Ford. 100 NM 5. Ford 290 NM I seem to remember reading online that the hub nut was changed at some point; Here's mine ( Ford 1008849); Here's the other (Ford 4659413); Whilst I'm always ready to admit that I'm not (by a long way) a professional car mechanic, I am a 'fairly' experienced mechanical engineer and have very much experience in cutting screw threads; Metric, BSW, BSF, UNF, UNC, ACME, square, helicoil and cutting threads on lathes up to 1/4" TPI. I know a thread that can hold 290 NM. I'm embarrassed to say that with hindsight, the Ford 1008849 was visually not capable of handling 290NM. I have a 500NM 3/4 drive torque wrench. I increased torque by 20 NM each step after 100 NM. My Ford 1008849 stripped at about 180-200 NM. It was made of multiple 'slices' of steel, the like that I haven't seen before. Please reply Ian & Stef, Which nut have you torqued to 290 NM ? I'd really appreciate a consensus on this matter. I'm more than ready to accept any conclusive verdict on this issue ;-) Best regards, H.. Quote Link to comment Share on other sites More sharing options...


.thumb.png.327e57655a9a82472089ef077ae02c11.png)


Recommended Posts
Ford UK Shop
Sponsored Ad
Name: eBay
Ford Model: FordUK Shop
Ford Year: 2024
Latest Deals
Ford UK Shop for genuine Ford parts & accessoriesDisclaimer: As the club is an eBay Partner, The club may be compensated if you make a purchase via the club
Join the conversation
You can post now and register later. If you have an account, sign in now to post with your account.