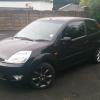
Exferes Posted November 2, 2011 Share Posted November 2, 2011 Hi all :) Welcome to my Ford Fiesta MK6 Project. Location of project: South Africa, East Rand area Reason behind project: Well i happened to buy an accident damaged ford for R19k (South African Rands) in march 2011. Car was sent to a backyard mechanic who did more harm that actual work. so i finally got it back after months of arguing and waiting. so i have decided to put the car back together myself :) I am hoping it will be a fun project :) Ok lets get this Project going.... Wait forgot to give some history first... let me add all the juicy details :D DAY 1 (Day of Purchase) So I had a little money saved at the current time and decided to buy an accident damaged car that wasnt too accident damaged. i found the below ford at a salvage dealer. he wanted R25k but got him down to R19k and a tow truck cost R650. Ok so thats what i bought. really not that much damage from the looks of things (Probably have no idea what i'm getting myself into :D ) Just need a new engine, bumper, fenders, bonnet, bits and pieces and 2 new airbags and covers. it will be running in no time ( Lol...Yeah Right! :D ) Quote Link to comment Share on other sites More sharing options...
Exferes Posted November 2, 2011 Author Share Posted November 2, 2011 Ok so this guy i know told me to drop it off at this panel beater he knows who does a cheap good job and it wont take long. so i went with it. so he was the middle man and told me i needed this and that and wada wada wada so i just organised money for the things. this went on for months and i started getting suspicious as to is anything happening. so i got hold of him he said it still ok but i didnt believe him so i rocked up at his house just before he left and told him we getting the ford, end of story. so he let me know only then that the ford is at his brothers house. so off we went to collect. when we got there..... what a sad sight :( . it was ruined :( . the tears were right there.. but i stayed strong. we loaded it up and i took it home. the below is how it came back to me. (Be warned, not for sensetive viewers) DAY 2 (Day the car came home) Quote Link to comment Share on other sites More sharing options...
Exferes Posted November 2, 2011 Author Share Posted November 2, 2011 Quote Link to comment Share on other sites More sharing options...
Exferes Posted November 2, 2011 Author Share Posted November 2, 2011 Quote Link to comment Share on other sites More sharing options...
Exferes Posted November 2, 2011 Author Share Posted November 2, 2011 (Wow posting the above pictures took ages :) ... well i did copy past but it felt like ages :D ) so thats the mess i have. i didnt know where to start :( so many parts and pieces and destruction :( (oh guy holding dashboard bar is stevey (a proud ford meteor owner, well looked after for its age) :) a good friend that came with to collect and witness the destruction) Quote Link to comment Share on other sites More sharing options...
Exferes Posted November 2, 2011 Author Share Posted November 2, 2011 so we got stuff into boxes. broken and non-broken. started vacuming, got a wet carpet out from the back passenger side so it could dry and then sat and stared at the car. then decided tomorrow is another day. that night i decided to google the ford fiesta for information. it went pretty well got some photos and info. how to remove the radio ( really not that hard :) ) i found the below as research: Quote Link to comment Share on other sites More sharing options...
Exferes Posted November 2, 2011 Author Share Posted November 2, 2011 Quote Link to comment Share on other sites More sharing options...
Exferes Posted November 2, 2011 Author Share Posted November 2, 2011 so google gave me all of that. its a start as im still blind in the direction of my project. that night i grabbed some of the broken plastics and tried putting them back together with glue. i had no idea what i was building, but it was never ending so i decided ill give up and go to a Ford Dealership the next day. The next morning i stopped off at ford and told the guys my problem, showed some photos (guy said nothing just gave a big smile), then i told him i have the dash board and i need to know what goes under it as i only have pieces. so he printed me some stuff... The Dash board This Bar thats been puzzling me The bar that goes with the dash (heaven knows where) Some air pipes that apparently fit in the dash This control unit for the fans and heater and stuff Wires that go throughout the dash i think Quote Link to comment Share on other sites More sharing options...
Exferes Posted November 2, 2011 Author Share Posted November 2, 2011 And then this.... the heater box I was like dam.... i was trying to build that... no wonder it was never ending... and that describes the big black unit in this photo below half the stuff is missing out that unit and i only noticed it now that ford pointed me in the right direction. Ford fiesta knowledge +1 (yay) and ford gave me this that must be the fuse box setup so with info at hand i called a contact and told him check for me at the scrap yards for this item. off he went phoning me moments later saying listen i found the heater box and the guy only wants R650. i was like come fetch me i have money. we arrived and saw how big this unit was. it is everything under the dash. it takes up all the space. i quickly took photos just incase i need them and cause i cant find them on the net. Quote Link to comment Share on other sites More sharing options...
Exferes Posted November 2, 2011 Author Share Posted November 2, 2011 Ok i then had to get the heater box out :) i helped to get it out nicely and wasnt leaving without it. we broke one small screw bracket for a side panel that goes the driver side. we didnt have a star and a flat wouldnt fit :( i had no choice :( but i got the box Quote Link to comment Share on other sites More sharing options...
Exferes Posted November 2, 2011 Author Share Posted November 2, 2011 ok so ford knowledge +1 (double yay) loads of info and a nice big new part that i dont have to build again :) (word of advice to anyone out there.. rather buy a complete heater box from a scrap yard than try build it. it will take too long and you will mess up or it wont fit together from all the added glue this is what i managed to get that day :) (so happy!!!!) the air box for the engine and the cover/tray that goes by the windscreen in the engine bay the filter unit for the heater box inside the engine bay had to glue a piece in the above photo. it was a disaster. i ended up with 3 pieces and blood and glue all over that plastic and my hands as i couldnt let go and slipped from putting to much pressure from holding it in place. i tried wiping it down but the glue that dried stayed red :( AND THE HEATER BOX! :) enough work and knowledge for the day:) (sorry the pics are not so detailed, i took them on the girlfriends camera and forgot to take them off so the above are after the day i got the heater box :( ) Quote Link to comment Share on other sites More sharing options...
Exferes Posted November 2, 2011 Author Share Posted November 2, 2011 ok so next day in the search for info i managed to get some missing items i paid for back. (Paid R5200 for front bits and pieces, but doesnt feel like i got all that i paid for, then again it was months since the actual purchase date so i think the guy made a quick plan to get me parts) here are the goodies (sorry used the girlfriends camera again and forgot to take the pictures off) ok thats all i got parts wise. as for info got some more pictures :) a friend came past and i got 2 snap shots for reference Quote Link to comment Share on other sites More sharing options...
Exferes Posted November 2, 2011 Author Share Posted November 2, 2011 then I hit the scrap yard again :) this was just so big i had to take a picture :) ok kewl so got info now lets give the car a bash :D Quote Link to comment Share on other sites More sharing options...
Exferes Posted November 2, 2011 Author Share Posted November 2, 2011 Repair Work Day 1 Ok it was a bit late this night and after work. stevey joined me and we had a look at the gearbox mount as i noticed it was horribly bent and it hit the ABS pump/controller we tried tried everything to bend it but no luck. we did manage to get the ABS unit out for a sample for a new one yip we tried a high lift jack :D it ended up lifting the car and we had to get another jack in there to get the high lift out. we also noticed the fire wall part by the heater box hole was bent so we had to organise a better hammer to fix it a bit. so work for that night was not much but motivation for the future :D Quote Link to comment Share on other sites More sharing options...
Exferes Posted November 2, 2011 Author Share Posted November 2, 2011 Repair Work Day 2 ok today we started a bit earlier as it was a saturday. got to friends who heard i was working on a car project and they wanted to join :D (yay help!!!!) They would be : Nel and Jones :) so they were ready to work and couldnt wait to start but lunch first for a clear mind :) ok so after lunch we tried the gear box mount/battery mount point again. my step dad also assisted. we tried the pole again... no luck. then i got the high lift.. attempt 1.. no luck as we tried resting it on the one plate were the wheel connects too and it kept slipping. then attempt 2... success, we put the high lift between the mount point and the firewall as i only noticed that there is a solid arm on the firewall and it wont bend from the force. we then tackled the drivers seat as it got bent some how. we stripped it and found a bar that was bent so well it looked like it was manufactured like that and even the metal seat part that hides the foam was bent so well it looked perfect. i had to hit it with the hammer to make it look like the passenger seat :) . we also managed to get the heater box in with the dash board bar. we struggled with the bar, i had to lie down and push it with my feet. but we came right. we got the fuse box in too and the breakbooster and pedals. noticed some of the plugs that register stuff were broken so ill have to hunt for some replacements. ok so day went well. just a concern to why the dash bar was so hard to align with the heater box and bolt holes. and we were lightly stripping this one bolt. so something is a little funny there but its in. the drivers seat and passenger seat YAY DASH BAR and HEATER BOX IN!!! with the boss giving directions :) Day over. time to pack up and shut shop :) Quote Link to comment Share on other sites More sharing options...
Exferes Posted November 2, 2011 Author Share Posted November 2, 2011 A good day of work :) Quote Link to comment Share on other sites More sharing options...
Exferes Posted November 2, 2011 Author Share Posted November 2, 2011 Repair Work Day 3 ok day 3, tried starting early again but the land of sleep was so comforting then the team called and woke me so we could get started ok so we gathered and pondered on the next move. had some aligning issues and bolts that needed alot of force to get them in. so we decided lets get a table out there and lets get the pc out there too for info when we need it :D hey the chickens joined too :) (weird things) ok so today we got all the cables in their right homes and figured out where everything plugged in and bolted the dash bar down. oh and we got the steering arm in and mounted it and i found out the unit where the key goes in was attached to the steering arm :D well thats kinda all we got done. even the girlfriend came to check the progress :P The pondering moments The girlfriend (Megan would her name :D )checking on the progress :) Day was already late and i didnt get more during day photos only as the friends were about to leave :) Quote Link to comment Share on other sites More sharing options...
Exferes Posted November 2, 2011 Author Share Posted November 2, 2011 the cables for the airbag were taped down as i have no airbags. they were already deployed from day of purchase :( We managed to get the dash board in the same night but while i was plugging stuff in i noticed the cable that plugs into the main head lights switch to turn the lights on and off was too short. it then hit me the cables had to go over the dash bar.. so not kewl. i had to take everything off and loosen all the bolts. i had to take the dash bar out flip the cables over and put everything back. (PS: Dont forget to do this if you remove the bar :) ) ok so progress was made. even had the speedometer clocks in and had to glue down that top part of the dash that the speedometer goes into. it was apart from the main dash. one part of the dash broke where i glued earlier that day. will have to fix it the next day So gotta get me some airbag and covers or just covers Quote Link to comment Share on other sites More sharing options...
Exferes Posted November 2, 2011 Author Share Posted November 2, 2011 Ok so hungry for info i went looking. i came across another scrap yard.. and to my luck.... a fiesta facelift model of mine... YAY!!! must take pictures! ok so to my luck it has what i need :) List: Airbags and covers. ABS pump/controller Water bottle for windscreen wipers Bonnet lock and cable Engine mounts Bracket for clutch and accelerator cable Gear lever and cover battery box with computer box holder Some guard that goes by the engine ( i might have that. will check) An engine and gearbox ok so i took pictures and made notes and got prices Quote Link to comment Share on other sites More sharing options...
Exferes Posted November 2, 2011 Author Share Posted November 2, 2011 Quote Link to comment Share on other sites More sharing options...
Exferes Posted November 2, 2011 Author Share Posted November 2, 2011 ford knowledge +1!!! ok now to get parts he gave me pricing of the following just for interest sake :) Main light (left only) R400 Steering pump + hose R100 ABS Pump R500 Floor mats R??? Gear Lever + rubber cover R100 Engine protector R100 Bracket for clutch and accelerator cable R50 Engine + gearbox mounts R500 Bonnet lock and cable R300 Engine and gearbox R10000 Cable harness for engine bay R500 Computer box R500 Airbags and covers R1500 Ford Mag and tire R700 later that afternoon i finally got the engine i paid for months back. been nagging for it forever and the guy gave in finally. not to shabby :) finally an engine... yay:) Quote Link to comment Share on other sites More sharing options...
Exferes Posted November 2, 2011 Author Share Posted November 2, 2011 Repair Work Day 4 Ok so that night i went to work on the car. feeling all excited that the steering arm is in i decided to put the key in.....hmmmmm problem i cant get the key in.. not cool. i can maybe get it in if i drop the steering arm with that lever but still makes no sense. i went back and checked photos... turn out the key part was messed up from when i bought the car not the best photo but the steering wheel clearly looks pushed back :( and it must be like this picture photos of the current state of my problem chickens came to check up on me :) funny things :) ok my conclusion. the dash bar must be bent :( so i took everything out even the bar. looked at it and i can see its bent. its not bent that bad but if we struggled to get it in then something is wrong. so i gave up for the night and decided to get the bar from the fiesta facelift model tomorrow Quote Link to comment Share on other sites More sharing options...
Exferes Posted November 2, 2011 Author Share Posted November 2, 2011 ok went back the next day and got the dash bar for R200. not too bad i helped take it out and it wasnt that hard. bolts came out nice (kept all the bolts i could get for just incase :) ) so i had a feeling this was the right bar and i had to have it:) Repair Work Day 5 Ok got home got the bar in. fitted much better and got the bolts in way easier. so this must be it :) dont know why but the door got my attention. it was loose so i decided to get the panel off. too my surprise... a speaker missing... they panel beater must have jacked them. not to worry ill make a plan there. maybe some Rockford Fosgate depending on the cash flow or some pioneer if my buddy will give discount :P ok so bar in and cables attached and..... hmmmmm.... same problem... not cool at all :( so i sat there in confusion as to maybe the steering arm is bent :( then something caught my eye. on that unit that the steering wheel mounts too there were these 2 bolts pushing against the pole and 2 ontop of the unit i loosened them all and got the screw drive and wedged the steering mount part forward.... oh my soul.. i didnt need a new bar :P the thing just got pushed in. LOL!!!! yay progress :) ok so i tried to mount as much of the dash as i could. i was right at the end when i got to the controls for the aircon and air duct and noticed an extra cable. hmmmm where does it belong. i really could find a home so i left it behind the unit loose and kept going. then when i wanted to put the plastic piece that goes like under the steering wheel (also has a fold down holster for money or stuff) i saw a place that holds something. i looked at the shape and notice it matches the cable i left loose behind the aircon controls. i tried my hardest to get that cable but noooooooo... i wasnt getting it that east. i had to take the whole radio part off. at that moment i decided im gonna clean everything :) so i started stripping the car. ( yes im mad :) ) lol pictures below ( chickens came to investigate again. they tried to get in the car this time but no luck. they just cant fly :) ) Quote Link to comment Share on other sites More sharing options...
Exferes Posted November 2, 2011 Author Share Posted November 2, 2011 made a note of the radio stickers as i think this is not the original radio and i might need the code somehow (any help will be fantastic :) ) it hit me that the cable that ford plugs into goes here yay another day of progress :) Quote Link to comment Share on other sites More sharing options...
Exferes Posted November 2, 2011 Author Share Posted November 2, 2011 Repair Work Day 6 Today nothing wow. just stripped the car more. the one back seat doesnt fold down so i had to figure out how to get it out. after some time fiddling i managed to get the cover where the lever is off and got the pliers in there and pulled the lever up and the seat came loose.. YAY!!! the plastic in there is broken so it doesnt pull the arm up... this is gonna a tough one to fix. will see how it goes. noticed all the Speakers are gone out the car. cant believed they jacked them any ways just need to get everything cleaned from the dust and greasy prints and the chickens finally got put in the car. no more curiosity he he not much done today :( and the weekend im away so no work progress going to be done till monday night. Quote Link to comment Share on other sites More sharing options...


Recommended Posts
Ford UK Shop
Sponsored Ad
Name: eBay
Ford Model: FordUK Shop
Ford Year: 2024
Latest Deals
Ford UK Shop for genuine Ford parts & accessoriesDisclaimer: As the club is an eBay Partner, The club may be compensated if you make a purchase via the club
Join the conversation
You can post now and register later. If you have an account, sign in now to post with your account.