Euan1989 Posted September 10, 2012 Share Posted September 10, 2012 Brilliant effort mate, must have the patience of a saint! Can't wait to see the finished product! Quote Link to comment Share on other sites More sharing options...
Exferes Posted September 10, 2012 Author Share Posted September 10, 2012 Thank Euan. Been a awesome project so far :) cant wait to have it running!!! :D Quote Link to comment Share on other sites More sharing options...
Exferes Posted September 10, 2012 Author Share Posted September 10, 2012 I got a shot of the windscreen the next morning when the sun was out yay its neally there!!! Quote Link to comment Share on other sites More sharing options...
Exferes Posted September 10, 2012 Author Share Posted September 10, 2012 Repair Work Day 25 Ok so got the windscreen in and went off to ford to ask how can i book the car in so they can get the engine started and i can keep working. Spoke to an agent there and he asked what i have done so far. Didnt go into to much detail but told him i took the engine,computer box, cable harness, steering column, key and key plastic thingy that goes by the key and put it in my ford. so he went to the workshop guy and they spoke a bit then he came back and let me know that it should have started the 1st time as all the original stuff is there. so he asked did i take the ABS system from the 1.6 and put it in the 1.4 and i said no just the engine. so he let me know that apparently the 1.4's speedo runs on the gearbox to give the estimate speed the car is driving at and the 1.6 uses the ABS system. so he recommended that i bring him a full working car so that they can attempt to program the car to try read either off of the gearbox or the ABS system to give the speedometer a reading other wise it will just be blank. so he said they recommend a full working car so they can make sure all works just not the engine. so they will drive it around and program and drive some more and program until its 100% or close enough. i was like.. dam :D ok ill get back to you :) so i decided time to put the stuff iv been putting off into action. fitted the flicker globes into the lights with those new globe socket holders. nice to see a completed light :) then started with the wheel hubs. I had to learn the weekend before that its not just a pop the wheel hub off and fit new bearings and then off you go. apparently they gotta get pressed out and new ones pressed in. so last weekend i spent the morning getting wheel hubs off just to find out that i still need a car to drive to get the bearings fitted. i was like..aw... oh well. so i put it all back together and will wait till the fiesta is running (which is soon i hope) ok so jacked the car up on some sort of solid ground that was sort of flat :D added some 2ton car holder things and got both front wheels off and got started ok here i already got the wheels off, the break calipers off and the break discs off (everyone must be wandering what the blazers are the ratchet straps for?? well i tried to hold the break calipers up so it didn't put tension on the hose, cause i couldn't get the hose loose off of the shock. so after struggling with the calipers and the ratchet strap i got a screw driver and forced the clip off and that was so much easier :D now the calipers can lie on the floor as seen below:) ok so now to the wheel hub... hmmm... ok just like the aveo get all the bolts loose first to make life easier... ok weird doesn't look like it just comes off... after some good looking around i noticed that the bottom part of the shock rests in the top part of the wheel hub and the only way to get it out is for the hub to go down and after some more looking around looks like the bottom of the wheel hub fits onto i think its called the wishbone of the car. so the wishbone part has to go down before i can get the wheel hub off of the shock. problem i found is the wishbone only goes so far down before hitting a plate under it and stopping it from going any further so.. i took the wishbone loose :D and with a little leverage used a wrecking bar to hold it down cause to get the rest of the wishbone bolts loose was like hell no :P they go all the way under the car and i needed some excessive force to get them loose. so ill go for the lazy man way first :D used a hammer and tapped the bottom part loose 1st (the above photo shows the shock coming loose already as and then started tapping at the top and off came the wheel hub and there lies the wheel hub. and the empty spot where the hub once was :) Quote Link to comment Share on other sites More sharing options...
Exferes Posted September 10, 2012 Author Share Posted September 10, 2012 For the right side did the same thing. all the bolts and nuts off. and loosened the wishbone and got the hub off i noticed on the right side the accident damage when got the wishbone loose. you can see the plate where the wishbone mounts too is bent. they must have hit the pavement as well when the car took the engine damage. that must be why the arms in the engine bay were a little skew. and the right wheel hub is off :) (rested the break caliper on a brick as this side of the car is higher up cause the ground is kinda at a slope :P nothing risky :D ) With the hubs off i decided lets give the hubs a bash. loads of pics missing :( sorry guys. but ti give you the run down. got the CV joints all lined up. was messing around with the outer and inner CV joint seeing if they both fit nice and stupid me forgot the C clip on the inner and slid it into the outer with a bit of force and it clicked in and i was like dam!!!! i forgot the CV joint grease.... noooooooo!!! so now i tried to get the dam thing loose. wow. i tired pulling and tugging and then yes i brought on the hammer and hit it around a bit and then was like dam. this thing aint budging without brute force. so i cut the CV joint grease packet at a like sharp triangle shape and started trying to squeeze the grease in through the gaps by the ball bearings. surprisingly a lot got in :D so i got the boot slid up over the outer CV (thank goodness i somehow remembered to put that on 1st) and wanted to tie it down with a clamp that you fasten with a screw driver but the ring cramp thing was too big so i tried those dodgy ones that come in the box. wow alot of fun that was :) after about 30min trying to get it on i was like no way. this thing is stupid so i left it and decided ill get those screw on clamps during the week. ok now the inner CV needs to get in. so i lined it up (yup i didnt forget the boot :) ) but for some reason it didnt want to go in... it looked the same and stuff but i couldnt push it in. so i decided to try the left 1st as the inner CV didnt have the outer CV on yet. so i greased it a bit and greased the the part by the gearbox and it also struggled so i got the hammer. tapped it a couple of times and nothing. then was like maybe some force. wait maybe more force. so i hit the CV joint in. it started moving and i think its in all the way but only looks half way. but now im worried. i hit too hard and bent the teeth at the end of the rod, so the outer CV joint doesnt go over :( nooooooo!!!! but wait!!.. the steel file should work!! so i started filing. making the groves visible again. after a while the outer CV finally goes over. but i didnt fit it yet. even thou the inner CV is in it doesnt move. it just goes round with the gear box. stopping when it hits the shock or the wishbone plate. i can make it move :( i got a pic of it before i gave up. sorry they arnt the best shots. was dark and hands were filthy. i asked some advice from family and some said maybe when the car moves it will force the inner CV to start moving. but now I'm stuck. what if i broke the inner CV's. they cost so much. well so far not to worry. tomorrow is another day. i wont give up :) ill try get more shots of the CV's so far and hopefully the newly pressed bearings :) Quote Link to comment Share on other sites More sharing options...
Exferes Posted October 16, 2012 Author Share Posted October 16, 2012 Got some extra shots of the CV joint If i twisted the CV joint clockwise it stops in this position If i twist it anit-cliockwise it stops here The damage after beating it with a hammer Ill have to get more info on it otherwise i packed her up and let her be for the night :D Quote Link to comment Share on other sites More sharing options...
Exferes Posted October 16, 2012 Author Share Posted October 16, 2012 Repair Work Day 26 Woohoo wheels hubs are back with the new wheel bearings fitted and they sprayed the hubs black.. nice :D Ok I was alone on this one and got my hands dirty fast so I missed a lot of fitting shots :( sorry guys. I do have some fitted shots ... yay :D during fitting it was a bit of a struggle. first I had to get the front right CV joint on and after I hammered the blazers out of it and then filled it down it wasn't perfect so I had to patiently wiggle it on till it was all the way. phew :P Now the wheel hub. Had to put the shock in the wheel hub first.. no other way really as shock has this piece sticking out that makes it right on the wheel hub so you can't fit it skew. I then worked the CV joint into the wheel bearing. wasn't too hard but had to be careful as I didn't want damaged teeth from forcing it in skew. it goes in super smooth without the shock on the hub but once hub is attached to the shock the movement is limited making the CV joint a little harder to fit but it went in ok. thank goodness I wacked the inner in at the angle I did, made the inner fit into the hub ok. ok then mounted the hub to the wish bone and put the bolts in for the shock and wishbone and the big nut for the CV joint. then popped the break sensor thingy into its hole and mounted the steering arm onto the wheel hub then mounted the wishbone back onto the bottom piece of the car. have no idea what that part is called but was a bit of a struggle as I had to push and put the bolt in and my strength just just wasn't there. just my luck my sister's boyfriend arrived and gave me hand.. extra hands make life so much easier :P as he forced the wishbone back a bit and I got the bolt in.. job done :) yay!! ok now I just had to try turn the hub to see if that damn inner CV would turn but ya didn't have the power to turn it so I popped the spare wheel on and then turned it. made a clang sound on first turn then away she went... it was turning... no issues... YAY!!!! ok now for hub number 2. Ok did the same procedure as hub number 1. all was going ok even the CV went in smooth and then the wishbone gave issues. we couldn't get the wishbone back on the piece under the car, it was like a whole 1cm out :( my sister's boyfriend tried pushing like last time and I pop the bolt in but it wouldn't move. he almost pushed the car off the tressel's that's how hard he pushed and nothing. it felt like metal on metal when we hit it with the hammer. ( so we tried wishbone mounted on car first then we attach the wheel hub... no luck. cant at all get the hub to go over this little ball joint thing on the wishbone. then we tried hitting the shock as high up as we can to give us some room to get the hub on the ball joint thing.. still nothing. ball joint thing doesn't bend far enough and the wishbone was that 1cm too far in... wow.. .what now :( .... but wait!!!! the HIGH LIFT JACK!!! B) so we got the jack.. had to use my sister boyfriends one as it was longer than the normal size which is just what we needed. ok so he lied down holding the high lift in one hand and the lever in the other (thank goodness he was there cause that thing I struggle to carry around) and I just held it by the light end (he he :D ) by the front left wishbone that was already on. he positioned his side and then off we went, he pull the lever once and it slipped so we had to try again. 2nd time it slipped again. 3rd time we had it perfect and pulled... BAM!!! the whole thing came loose. the arm with the bolt right at the top of the high lift wasn't tight so it came loose and pulled straight. he said that's it we can try tomorrow as he was dead tired and it was almost midnight. so we left it as is for tonight. I couldn't go on on my own as stuff was getting too heavy :) . but least we made progress. glad he popped around otherwise id still be on hub one :P no for some pictures :) side A fitted popped the wheel on for turning the inner CV the side that gave all the issues inner CV in all the way the whole 1cm out :( tried all we could to get it in and thats it for the night so close ... so close Quote Link to comment Share on other sites More sharing options...
Exferes Posted October 16, 2012 Author Share Posted October 16, 2012 Repair Work Day 27 ok back to that hub. sadly guys I have no pictures of the hub being fitted. I searched all my camera's and phones and not one had a picture. I sadly don't remember taking any. well ill try put all the details in :D so I was definitely on my own today. I knew I could do it. ok checked this high lift out and lying on the floor holding it up wasn't going to happen... really heavy need a plan here... BRICKS!!! :D I went around the yard and grabbed all the bricks I could find and rocks too :D then I strategically placed them the right height for the high lift to reach both wishbones. now to line up the wishbone. ok so I pulled the leaver 1st time and it came close. so I pulled the lever again and over shot it. dam :( no I have to loosen the whole high lift. so I did that and repositioned it and tried again. pulled it once and then on the second time I pulled it till the hole lined up. problem was as soon as I let go with one hand it pulled back and I couldn't get the bolt in :( 1 arm strength was too little. nooooooo :( wait I had an idea. I used my legs to hold it in position and then pushed the bolt in and tapped it with the hammer all the way.. woohoo :D dam i was like .. well i just lay there for a while he he :D ok sweet its on. so got the wheel on just to make sure the inner CV joint turns. and we good to go :D since both hubs were on and good to go i put the brake discs on and brake calipers and wheels. now just to put some odds and ends on to make the car drivable for ford. started with the tray that goes below the windscreen and the windscreen wipers stick through it. the dam thing wouldnt fit no matter how i put it. even put the lip at the bottom of the windscreen 1st then the tray. still no luck. so i was like what ever.. bring on the hacksaw!! :D so i cut a piece out of the windscreen wiper tray so that the wiper would fit nicely and bam it worked and looked ok :D then i decided to fill up all the bottles. got some brake fluid going. then the water bottle and squeezed the pipe to get some water circulating. then filled the wiper bottle and noticed it was leaking.. time to fix :D did the best i can but doesnt look that good and too top it off.. still leaking :D checked the oil and that looks good. didnt put power steering fluid as the pipe is still bust and same for the aircon. put the air filter box back and the only piece i had that goes to the front grill missing another piece by the looks of it. decided to pump the brakes just incase and well it went kinda smooth. hard at first then got easy. but then i had topup some brake fluid. then while infront i saw a puddle under the car.. touched it and it was clear fluid.. hmmm something aint right. decided to investigate looked in the engine bay and didnt see much. needed some help so i asked the neighbour if he can come push the brakes. so he pushed first time and wow.. a fountain of brake fluid. silly me forgot to tighten the dam pipe in the abs unit. there was brake fluid everywhere. what a mess. ok had that tightened so i told him to press a few more times and nothing came out. woohoo... but wait.. there is more.. i went back to the drivers seat and to my surprise more brake fluid. this time from the back of the car. so i got under and looked. the tow truck must have undid the back brake screws to let him tow the car. ok so i tightened those too and all looked ok. so far i think she is ready to go in. just need to organise a trailer and sorted :D so close guys :D Quote Link to comment Share on other sites More sharing options...
Exferes Posted October 17, 2012 Author Share Posted October 17, 2012 Repair Work Day 28 Went out today and got a car trailer. was a dam big one but its all they had and i really wanted the car to go to ford so i took the big trailer :D We had to tow the trailer with a chana /channa (how ever you spell it) cause the hilux my stepdad has is too high and would have forced the trailer to scrape on the ground, and even if we did use it non of us could lift it onto the towbar cause the trailer was so heavy. well anyway the poor chana struggled but pulled the trailer home. then we had to get it in the driveway. that took forever cause we couldnt push it as it was too heavy so it was a case of in out till it finally made it in. after all the reversing we used the pulling thing on the trailer to pull the car up. problem we had now is we couldnt tow it. the trailer was almost 600kg and with the ford on it was over a ton and the chana could only handle so much and the hilux's are too high so we would end up destroying the trailer. sadly.. yes i know opel is hated... but i had only one friend that could help me at that time of the morning and had a code 10 drivers license to tow over 750kg's without getting a fine and his bakkie was a 1.8 so it was atleast gonna be a smooth trip to ford. so he arrived and we got the trailer setup on his vehicle so in the morning we could just head off. we decided to do a little inspecting before it went as the ford dealership would be driving it and i didnt want any hick-ups or an accident. thank goodness we checked as 2 of the wheel hub bolts were loose and the tires nuts were still loose. we checked the lights and i forgot the bulbs so had to put those in. the filled it with about 20 liters of fuel and as we poured it fell out the bottom. we check and the tow truck guys pulled the fuel pipe off of the tank to siphon the petrol. the anti siphon filter must have gotten in their way so they went straight to the source. that fuel pipe on the tank was a mission to get back. its so solid and doesnt have much room to bend but we finally got it on. i also forgot to mount the exhaust to the manifold but there was no time left for that so ford is gonna have one noisy car on their hands :D well it was already 12pm and we needed some rest for a early trip to beat traffic so that was it for the night. next morning we got up early. got some food in the system. fastend the ford down. now to get the trailer out. the way we got the trailer in it somehow got wedged behind the wall so now the mission started to get the trailer out so it was backwards forwards till no progress was showing. so we decided get the car at another angle. then we tried again. no progress. ok next idea. jack the trailer up with the highlift then pull it sideways away from the wall and then attach the trailer on the bakkie and try again. woohoo that actually worked. so we had it out the driveway. next issue. the way we got it out it was heading straight towards a tree. this morning couldnt have gotten any slower. so now some more backwards forwards. it got to the point were we miss the gate but hit the tree which would lead to the trailer driving up the tree or we miss the tree but hit the gate but the wheels would still stay on the ground. so... think... think some more... what the hell. told my friend to give it some gas and bam hit the gate and pulled past and it was out :D will sort the gate out later. but yay the ford was out the yard. so off we went to ford. smooth trip the whole way. got to ford booked it in. off loaded the car. handed over the keys and that was it for us. :D no we await ford's phone call to come say its ready :D the night before. we got the ford on the trailer ready to go and did some checks to make sure its ready then morning comes and we were ready to go and thats the fiesta being dopped off at ford :D i hope ford gives good news. and hope its soon :P Quote Link to comment Share on other sites More sharing options...
Exferes Posted October 21, 2012 Author Share Posted October 21, 2012 Bad news guys.... Ford phoned... said i must come collect the ford. they cant get it started. asked the guy what was missing, he said i need the speedomete unit and the fuse box and the interior cable harness. so i told him ill collect. i shot off quick to the scrap yard to go look for the missing bits but all i found was the speedometer unit. the scrapyard ford was already being cut up so im lucky the unit was still there. it was so brown you couldnt even see the digits on the unit. had to strip it and clean every where. took forever but it looked good as new. then collected the car at ford.. shame it had to come back on a trailer. wish it started :( And off it went back home. Yes it is on the Chana again :) poor thing went flying forward as the guys pushed the car on. it had the hand break up but the weight of the ford lifted the chana's rear up and it wasnt in gear so it went shooting forward :D but we got the ford on the trailer. we had to use a dodgy trailer. was the cheapest alternative. you must all be wandering where are the wheel ramps. well.. .the trailer was designed for a dune buggy and the ramp piece folded over the car and was tied down, problem for the ford it would have scratched the boot lid broken. so the ramp had to be grinded after we got the car on. everyone was like WTF?? there at ford :) he he :( hope i can get some thing right. good news is ford didnt charge me. they said just get every thing back in and bring it back so they can finish and get it running. oh well.. let me not give up now. there is still hope :D Quote Link to comment Share on other sites More sharing options...
pLUSpISTOL Posted March 18, 2013 Share Posted March 18, 2013 Dude, you're so close it's unreal! So... 5 months since your last post, what's the latest?! :D Quote Link to comment Share on other sites More sharing options...
Maxxxykins Posted March 18, 2013 Share Posted March 18, 2013 Wow that was an amazing read! Well done so far! Quote Link to comment Share on other sites More sharing options...
Preee Posted March 18, 2013 Share Posted March 18, 2013 I love to know how you got on with this project i followed it from the start it was amazing read Quote Link to comment Share on other sites More sharing options...
Exferes Posted June 25, 2013 Author Share Posted June 25, 2013 hey guys. sorry iv been so scarce. Been busy with work, pc games, family, friends he he bad excuses to not update my progress :) wow its been so long. hmmm to think where i left off... :D so i got the car back from ford. they said im probably missing the fuse box and the spedometer unit. so the next day i decided to go back to the scrap yard where i got the engine from in hope to find either still there. sadly i got there and the car was missing the whole front right section and the inside was completely stripped. oh no what to do now :( so whilei was there i looked inside the heap of broken stuff inside the car to see if there was anything i can use. to my luck i found the spedometer unit. it was completely brown inside and out. i took it anyway in the hope it might still work from all the weather damage. couldnt find the fuse box but i dont really see how it could effect the car starting. so i stripped the spedometer unit to clean out all the sand and dirt. it looked brand new again :D i was still at work so i will only try fit it in the next day. wish me luck hope it gives good results :D Quote Link to comment Share on other sites More sharing options...
Exferes Posted June 25, 2013 Author Share Posted June 25, 2013 wow great news!!! so i fitted the unit and turned the key... all the dials lit up like normal but the kilometers changed from about 70000 odd to 50000 odd which must be the original millage of the 1.6 engine now to start the car and hope for the best :D so exciting !!!! started 1st time!!! woohoo... oh yes!! below is the video clip. its black i know, my sister forgot to open the lense of her video camera before passing it on to my girlfriend. you can hear it start and there is also a whistling noise. no clue what could be causing that. but yay it starts :D http://s1238.photobucket.com/user/exferes/media/Ford%20Fiesta%20Project/Repair%20Work%20Day%2029/20121022052024_zps11d574f0.mp4.html decided since it starts might aswell take it round the block for a test drive. i have visual footage of this moment. the lense cover was off but the camera was out of focus for a little while and then came right :D can hear mom giving some support in the back ground. got my sister to take some pictures too :D http://s1238.photobucket.com/user/exferes/media/Ford%20Fiesta%20Project/Repair%20Work%20Day%2029/20121022052052_zps55948aca.mp4.html http://s1238.photobucket.com/user/exferes/media/Ford%20Fiesta%20Project/Repair%20Work%20Day%2029/20121022052113_zps4b1cb4d6.mp4.html it is a bit loud as i havnt put the exhaust back properly where the branches meet the piece under the car. will get to it soon :) ok so took it round the block.. wow doesnt sound good.. some terrible scraping noise form the front. sort of got it on video. and the idling is still up down up down. hmmm wander why. maybe the air flow meter isnt set right. http://s1238.photobucket.com/user/exferes/media/Ford%20Fiesta%20Project/Repair%20Work%20Day%2029/20121022052434_zps09e4738d.mp4.html here are the photo's from starting till we came back incase the vids dont work :) My step dad joined with for the 1st drive around the block :D I assume this was left behind when i decided to take it around the block. didnt know till i got back. and off we go (gotta love the back of a fiesta ) just short a nice bumper kit and twin pipes :P and we made it back all in one piece. the girlfriend got us on camera coming back in :) and we have landed. wow that tape around the windscreen looks bad. should never have used it in the 1st place OK so that noise was really a killer so i jacked the car up and checked underneath by the drive shafts and yip there was issues... glorious who knows what liquid pouring from somewhere something isnt right. looks like the shaft is catching on the plate that goes under the car to hold the wishbone in place. its squished the cv boot and pushed it off of its markings and broke the metal clamp that holds the boot in place i think it must have gotten bent from the accident. must have been from a pavement before the car hit a pole of some sort. if i look at this photo from a while back it looks bent and i struggled to get that wishbone in easy. looks like im going to have to go look for a new plate that goes under the car. hopefully a straight non bent one :) so far its been a good day. the car started and it drives. cant believe its come this far :D and taken so long Quote Link to comment Share on other sites More sharing options...
Exferes Posted June 26, 2013 Author Share Posted June 26, 2013 so... the above happened a long time ago now that i think about it :D so between late october and late june what has happened to the ford so far?? let me see if i can remember all the updates and details. sadly pictures are not available :( i have no clue why but ya missed loads of pics. i dont have exact times and dates so ill sum it all up in a long story :) After we got the car started and driving and heard all that noise from underneath i decided to go get a new crossmember (googled the name of the part he he :D ) i found that the fiesta i was getting parts from had it lying in its boot. was still in perfect condition. i checked that it was flush all round when i put it on a flat surface. so off i went home to install the new part. my step dad gave me a hand to speed things up. i see the plate is supported by the chassis with some big bolts. we also had to remove the bolts on the hubs and steering so we could drop it. i see the sway bar is attached to the unit so had to move that over to the new unit. i only have a pic of the old unit off of the car (i took it today :D still have it lying around) the dog ran in to investigate as i took the picture this is the new addition to our family :D the plate is very big. doesnt look that big on the car :) ok so got the new plate installed.was a bit of a mission getting the front right wishbone back in but with a bit of brute force all was back together took it out for another drive and that noise was still there. not sure what it could be :( 1 Quote Link to comment Share on other sites More sharing options...
Exferes Posted June 26, 2013 Author Share Posted June 26, 2013 we got the car jacked up again and removed the wheel hubs and all the other bits down to the drive shafts or tripod looking things. decided to replace those as the one bearing was bent on one of them. that was a really a hard job to do. getting them out is really hard. had to get a old cv joint and attach it to the end and hit it with a rubber hammer till it came out of the innver cv joint. yet when you pop the new one in there is no effort at all. so did all of that and put everything back together and tried another test drive around the block. still the same noise :( im really confused now. it cant be the new engine and gear box as it was in perfect condition. so i decided to take the car to a cv joint place in town just incase i was missing something. they called me later on to let me know there is nothing they can do. they assume it might be the gear box. so had to take the car back home. what a nightmare afternoon that was. was alone and had my friends corsa utility and the trailer. had to load it on myself. funny enough no one helped guide me at all they were all impatient as i blocked the drive way to load the car. i sort of got it on a hill so it was a flat surface but as i drove up the ramp the back of the corsa lifted up and went forward. so i tried again with a bit less speed and got the car on. went out to look and how i made it on the lord alone knows. the car was almost off the side of the trailer. but it was on and had to head off home. so got back home offloaded the car took the trailer back and then decided im going to jack the car up and put it in gear and see what happens. maybe i can find the noise. wow what a bad idea :D the whole engine was shaking the inner cv joint was pulling out of the gearbox i turned it off and went back to check and all the gearbox fluid was pouring on the ground. something was really not right.so i decided to call our mechanic friend across the road and ask if he can take a look. he has the better working invironment to work on cars. so i dropped it off and waiting for results. he called and let me know the inner cv joint was bent and they replaced it. they also had to put spacers somewhere to stop the tripod looking shafts from popping out. i went to collect and took it for a drive and wow much better. just a knocking noise and the exhaust scraping on the heat shield. but it drives!!! yay i decided since its working let me get it looking all nice and painted. i didnt have the setup to do the spray painting so i sent it to some people we know over christmas to new year. least the car was out of the way and locked up and they had plenty time to work on it. i fetched it in the new year as they had finished up. they did somehow manage to crack the windscreen but it was a small crack so i decided to leave it and collec the car. i just needed to clean it up and make it look all new :D i only have this photo of the car that i managed to take wow it looks so alive i took it home to show everyone how good it looks :) 1 Quote Link to comment Share on other sites More sharing options...
FiestaZS90150 Posted July 3, 2013 Share Posted July 3, 2013 looks good =) well done Quote Link to comment Share on other sites More sharing options...
Gombal Posted July 3, 2013 Share Posted July 3, 2013 Awesome job! Incredible if you look at the first pics and the last, i think Ford should give you a job, you must be able to build a Fiesta with your eyes closed now ;) Quote Link to comment Share on other sites More sharing options...
Exferes Posted July 25, 2013 Author Share Posted July 25, 2013 Thanks. Yes it’s been a good project :) well almost but not that bad yet :D but it’s nice to know thecar, had a few rattles but a really annoying one behind the dash. So I quicklystripped the dash (could never have done that back in the day) and found Iforgot to tighten one of the bolts that holds the heater box :) silly me. Sorry for no new picks yet. Promise they are still coming. I’m almost there. So far got a new badge so front grill is complete, got the bonnet nozzlethings to spray the windscreen and got the globes for the spots in the bumper. Damnford were cleaver when they did those globes. Tried every spare shop I couldfind and no one could help me. So I had to go to ford. I got them for roughly30 Euros each (385 rand) it’s this globe with the plastic clip piece mouldedonto the globe. So it’s a ford only item. No wonder I see so many fiesta's thathaven’t replaced the globes. I am still struggling with the Air bags. found non second hand yet or even just the covers. Was thinking of maybe putting an aftermarket steering wheel on the drivers side if i still cant get lucky. It about 800 Euros (10200 rand) for the Air bags at Ford and sadly we have guys that repair air bags and they want even more to repair them than for does brand new. I sorted th exhaust finally. The rattling from front to back was killing me. So its a much quieter ride now. I have to look into the drive shafts. when you accelerate to a point it makes a scrapping noise. think its around 40KM/ 25miles. if you put the clutch in it stops and if you relase the clutch the noise comes back. So maybe the gear box is putting tension on something. Going to have to look into it, cant be a good thing. also noticed when you accelerate the car pulls heavily to the right. you driving like normal and let go of the steering it drives straight but as you give it some gas it pulls right. im really not sure why it is doing that. also noticed when idling the car shakes alot from the engine like i have a old v8 in there. think maybe engine mountings. but not sure as i replaced those. i also have a leaking fuel tank. filled it up full and out came all the petrol. so going to have to sort that out aswell. so just some minor big things to do still and it should be complete :D but ill try get those pictures up of the outside so long :) Quote Link to comment Share on other sites More sharing options...
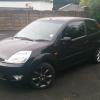
Exferes Posted November 13, 2013 Author Share Posted November 13, 2013 Hey guys. wow been long since i was here :D but before i start.. here are some up to date pics of the car completed and on the road :D ok took those just now :) so they are recent. still havnt hud luck with the airbag covers yet so iv given up on them.bought an aftermarket steering wheel for the drivers side and i just need to neaten up the passanger airbag cover. it is missing for now as iv had friends try find a weird rattling noise from under the dash. had no luck yet and its the last rattle i need to get rid of. i have sorted the scraping noise. took it to a new mechanic and he said they tightened the shocks and the bottom plate that mounts under the car. said some bolts were loose. and he tightened the drive shafts. cant believe the last guy loosened stuff and still told be he heard nothing. well the noise is gone. it was that scraping noise when accelerating. i also got some mags from the new fiesta. sadly one is bent and 2 are black and 2 are silver but they beat the old bent mags. also got Speakers from the doors. yay car sound!!! i was singing along to rattles :P things still left which im getting too slowly :D the power steering bottle started leaking. my make shift planlooks like it has failed. lol there is power steering fluid all over the engine bay and all over the garage floor. need to connect the spot lights in the bumper need to find out why the doors light on the consol stays on when doors are closed(it keeps the light in the car on) need to sort out the petrol leaking out the tank. hmmm i think that was it so far.. oh still need to do the aircon in the car. found a guy who can do the pipes for cheap but i got to get in there and get them out.dam gonna be a hard job but so far im happy with the ride. wow its been a long project :P 1 Quote Link to comment Share on other sites More sharing options...
kud Posted April 26, 2014 Share Posted April 26, 2014 That build is epic my friend, your a brave brave man for attempting it and I salute you lol. Quote Link to comment Share on other sites More sharing options...
Exferes Posted October 8, 2014 Author Share Posted October 8, 2014 Hi all :) wow havnt been here forever. So sadly i have bad news... the project has come to a end... a complete end :( Had some small things to tend too to finally make the project complete but a friend needed a car and i sold it to him at a good price as he sold me my first car at a good price. so i returned the favor. he was very proud of owning the car as he knew how far it has come and all the hard work put into it and we were still going to finish off the small things. Sadly there were in an accident and the car took a beating in front from a side impact on the nose. lucky no one got hurt. i have added the pictures from when we fetched it from the holding grounds :( Poor car :( it doesnt look like much so i decided to start taking panels and parts off in the front. saw that the arms were bent as well as a broken starter (it fell out in pieces) the engine was pushed back against the firewall. but where everything was shifted too it still rolled freely on the wheels, had breaks, lights and car sound worked. just never started the motor to see if it could drive. but for me work was getting to much and didnt have time to bring her back to life again. so sadly the car was sold as is :( It was a great project and wish i could have seen it to the end :) it taught me alot :) also what to look for when buying a new car wether it is brand new or 2nd hand or even accident damaged and repaired really well. Thank you all for the support! :) In memory of my project :D 1 Quote Link to comment Share on other sites More sharing options...
pLUSpISTOL Posted November 19, 2014 Share Posted November 19, 2014 Oh man I was not expecting this ending!!! The pics of it on the road looking all shiny were great to see! Gutted for you but it was an amazing project to read about and you should be proud of yourself and your friends who helped. Like you say, at least nobody was hurt in the crash. Thank you for sharing the story Exferes! Quote Link to comment Share on other sites More sharing options...


.thumb.png.327e57655a9a82472089ef077ae02c11.png)


Recommended Posts
Ford UK Shop
Sponsored Ad
Name: eBay
Ford Model: FordUK Shop
Ford Year: 2024
Latest Deals
Ford UK Shop for genuine Ford parts & accessoriesDisclaimer: As the club is an eBay Partner, The club may be compensated if you make a purchase via the club
Join the conversation
You can post now and register later. If you have an account, sign in now to post with your account.