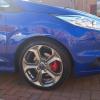
Lenny Posted March 31, 2012 Share Posted March 31, 2012 Guide Fitting Gen Labs LED DRL'S Auto Dimmer Relay This Guide is now available to download in PDF format see link: http://www.fordownersclub.com/forums/topic/62843-guide-fitting-genlabs-auto-dimmer-to-focus-drl-or-gauges-pdf/?p=420105 Here is a Guide to fitting a Gen Labs auto Dimmer for Drl's but i have used the auto dimmer module for my ST gauge Pod instead of fitting it to some DRL'S and it is a fantastic little piece of kit, i have drawn a diagram in this Guide for fitting the unit to DRL's but i have used it to dim my gauges and it works 100%if you are fitting some DRL'S or aftermarket gauges this is a must have piece of kit, and ideal for DRL's to ensure they are road legal and not blinding to other drivers at night. Here is a link to the one i have used in this guide:http://www.ebay.co.u...=item35bb427888they also offer a kit for the drls that dims the drl's when the indicators are active:http://www.ebay.co.uk/itm/LED-DRL-DAYTIME-RUNNING-LIGHT-AUTO-SWITCH-RELAY-DIMMING-DIM-INDICATOR-CANBUS-/230770351113?_trksid=p4340.m185&_trkparms=algo%3DDLSL%252BSIC.NPJS%26its%3DI%26itu%3DUCI%252BUA%26otn%3D10%26pmod%3D230760547248%252B230760547248%26po%3D%26ps%3D63%26clkid%3D7714103082233624020The unit is much smaller than I was expecting, as you can see the size in the picture below when positioned next to the ford key Fob, it fits in to practically anywhere, supplied with a double sided sticky pad for easy mounting to prevent it from rattling around. The unit comes supplied with instructions for fitting to DRL's so here is an image of what you get in the post:Below this text is the Diagram i have drawn for the unit to be wired to DRL'sBelow this text is the Diagram i have drawn for the unit to be wired to Gauges if like me you want the gauges to illuminate 100% brightness when the ignition is on, and automatically dim to 50% Brightness when the interior lights are switched on. then splice the white cable and the orange cable to each other. the results will be 100% light on with ignition and when you switch on your lights the gauges will dim to 50% brightness thus less glaring at night giving a nice stock apperance and easier on the eyes when driving at night, while also being clearly visible during the day. but if you would prefer to have control of when the gauges Dim to 50% you can purchase some cable and a rocker switch from here:2 Metres of Cable:http://www.ebay.co.u...=item27bd5915eb12v Rocker Switch:http://www.ebay.co.u...=item2a14a420a1Insulated Crimp Spade Connectors:http://www.ebay.co.u...=item43aac59542and run the two cables both white and orange to the rocker switch via the additional cable, this will mean that the gauges will illuminate 100% all of the time when the ignition is on, unless you put the switch to on, then the drls will dim to 50% until you put the switch back off again. I had already installed my gauges before i realised they were too bright for night driving, so i had to re trace the connections and if this unit in to place, So i removed the stereo surround and the stereo, taking note of the stereo code prior to removal, and also removed the switch panel for the rear window de-mister, where i had spliced in to an interior light positive feed, i removed the original cable leading to the gauge light positive feed and spliced in the grey feed from the cable instead, to the positive interior light feed. Then Splice the Yellow feed from the module, to the Positive feed leading to the Gauge lights.Only 3 cables left to connect Next Step is to splice the red feed from the module to the Ignition Positive feed in the car,i have used the Interior heater controls to obtain an Ignition Positive Feed for the gauges Power,so i spliced the Red feed from the Module to the Positive ignition feed on the heater controls Coloured Black/Orange. No Image of this one sorry,Final Step :Splice in the Negative feeds from the Module in to the large black feed at the rear of the climate control unit,i had already spliced a feed to the large black cable for the gauges previous wiring arangment so i spliced in to it instead of making two joints in the original loom.Job Done replace all panels and stereo,im very happy with the end results, my gauges now illuminate when the key is turned in the ignition, and also automatically Dim at night when the lights are switched on. Quote Link to comment Share on other sites More sharing options...
Lenny Posted March 31, 2012 Author Share Posted March 31, 2012 Here are the Results Standard 100% Ilumination Ignition on with lights off Night illumination 50% with Ignition On and lights on Quote Link to comment Share on other sites More sharing options...
Preee Posted March 31, 2012 Share Posted March 31, 2012 Nice Guide Lenny , and a nice bit of kit for anyone wanting to use it for DRL's or Dimming anything else :) 1 Quote Link to comment Share on other sites More sharing options...
Lenny Posted March 31, 2012 Author Share Posted March 31, 2012 Nice Guide Lenny , and a nice bit of kit for anyone wanting to use it for DRL's or Dimming anything else :) thanks pree, ive updated with night shots too, very happy with it, you can see how they now almost match the illumination level of the speedo cluster. Quote Link to comment Share on other sites More sharing options...
Preee Posted March 31, 2012 Share Posted March 31, 2012 Thats a good match lenny , and like you say less blinding Quote Link to comment Share on other sites More sharing options...
Stoney871 Posted March 31, 2012 Share Posted March 31, 2012 1 Quote Link to comment Share on other sites More sharing options...
Lenny Posted March 31, 2012 Author Share Posted March 31, 2012 Thats a good match lenny , and like you say less blinding yes mate, as you can see in the first image and in this image here they are very bright when at 100% illumination at night, and were very visible to drivers behind me through the rear window but thankfully this module has stopped all of that. Quote Link to comment Share on other sites More sharing options...
bela Posted April 1, 2012 Share Posted April 1, 2012 That is very useful , thanks While I am on do you still have the focus stainless fuel cap cover for sale Bela 1 Quote Link to comment Share on other sites More sharing options...
Lenny Posted April 1, 2012 Author Share Posted April 1, 2012 That is very useful , thanks While I am on do you still have the focus stainless fuel cap cover for sale Bela Hi Stephen,thanks for the comments mate, and sorry to say the fuel flap cover has been sold, Quote Link to comment Share on other sites More sharing options...
Stoney871 Posted April 1, 2012 Share Posted April 1, 2012 Cheers Clive, Hope this Guide Helps others, I take it your very happy with it :D Hi Stephen, thanks for the comments mate, and sorry to say the fuel flap cover has been sold, Yes and ;) 1 Quote Link to comment Share on other sites More sharing options...
luke simp Posted July 24, 2012 Share Posted July 24, 2012 hi lenny brilliant guide ive got the exact same relay for fitting with drl's but struggling to connect to the ignition part of it. you wouldnt know which wire i should splice into thats located in the engine fuse box? or how i should go about it? many thanks Quote Link to comment Share on other sites More sharing options...
Lenny Posted July 24, 2012 Author Share Posted July 24, 2012 hi lenny brilliant guide ive got the exact same relay for fitting with drl's but struggling to connect to the ignition part of it. you wouldnt know which wire i should splice into thats located in the engine fuse box? or how i should go about it? many thanks hi luke, thanks for your comments, the best i could recommend you to do is purchase a fuse splicing kit that will take power from the ignition feed inside the engine fuse box, basically all you do is remove the ignition fuse and insert the fuse shaped piggy back plug, then insert the ignition fuse in to the side of the plug and another fuse the same level of amps as the ignition one in to the side of the plug to get it all working including the DRL's this way their is no snipping or joining of cables in the engine bay or risk of water engress shorting your ignition fuse, here is a link to the unit: http://www.ebay.co.u...=item2a14b1c2ff connect the DRL positive feed to the red cable on the piggy back fuse, then isert the fuse in to the side of the adaptor, now you just need to find the ignition fuse in the engine bay fuse box, if you lift the lid and look under the lid it will have a diagramme of all fuses and show which one is the ignition. ;) Quote Link to comment Share on other sites More sharing options...
luke simp Posted July 24, 2012 Share Posted July 24, 2012 thanks a lot lenny, just new to this forum and realising how helpful its going to be. looks like a good piece of kit, all ordered and will get to it as soon as it arrives. thanks again Quote Link to comment Share on other sites More sharing options...
Lenny Posted July 24, 2012 Author Share Posted July 24, 2012 thanks a lot lenny, just new to this forum and realising how helpful its going to be. looks like a good piece of kit, all ordered and will get to it as soon as it arrives. thanks again no problem mate, and welcome to the forum, Dave is a top man at Auto Star electronics, you wont be waiting too long for your order, i buy all of my automotive electrical cables and connectors from him and he dispatches same day when possible with any orders before 5pm shipped same day, all quality stuff too. Quote Link to comment Share on other sites More sharing options...
gc88 Posted July 25, 2012 Share Posted July 25, 2012 no problem mate, and welcome to the forum, Dave is a top man at Auto Star electronics, you wont be waiting too long for your order, i buy all of my automotive electrical cables and connectors from him and he dispatches same day when possible with any orders before 5pm shipped same day, all quality stuff too. Hi mate, how do these piggy back things work? I assume you take the old fuse out, plug the pig in. Then plug the removed fuse into the bottom socket? Then a new one into the top socket which is what the wires conenected to? You probably dont need to reply as i think i just explained it to myself? 1 Quote Link to comment Share on other sites More sharing options...
Lenny Posted July 25, 2012 Author Share Posted July 25, 2012 Hi mate, how do these piggy back things work? I assume you take the old fuse out, plug the pig in. Then plug the removed fuse into the bottom socket? Then a new one into the top socket which is what the wires conenected to? You probably dont need to reply as i think i just explained it to myself? yes that is correct mate, so if you wanted an ignition feed they are the easiest way to get one in the engine bay compartment, Quote Link to comment Share on other sites More sharing options...
GSM Posted September 22, 2012 Share Posted September 22, 2012 Looking for this relay for my DRLs, as the one I have just now just switches them off altogether with the sidelights and I'd quite like to have them still on at night, but half brightness, as you see on some luxury vehicles. But the eBay store for that company doesn't seem to be listing them :(. I sent them a mail to see if I can get them elsewhere, but in the meantime, anybody know of an alternative place to get such a relay? 1 Quote Link to comment Share on other sites More sharing options...
Lenny Posted August 5, 2014 Author Share Posted August 5, 2014 UPDATE : Found new supplier of the auto dim relay See here: http://m.ebay.co.uk/itm/301262830768?nav=SEARCH Quote Link to comment Share on other sites More sharing options...
gaztdci90 Posted November 28, 2014 Share Posted November 28, 2014 How can I get the standerd pod to light up 1 Quote Link to comment Share on other sites More sharing options...
Lenny Posted November 28, 2014 Author Share Posted November 28, 2014 How can I get the standerd pod to light upUnfortunately i dont have a schematic wiring diagram for the ST pod in order to know which terminals leed to the positive & Negative illumination feeds, However this guide will help you 100% with the opposite end of the cable ;) Quote Link to comment Share on other sites More sharing options...
Lenny Posted November 2, 2015 Author Share Posted November 2, 2015 Hi mate, how do these piggy back things work? I assume you take the old fuse out, plug the pig in. Then plug the removed fuse into the bottom socket? Then a new one into the top socket which is what the wires conenected to? You probably dont need to reply as i think i just explained it to myself? that's correct mate Quote Link to comment Share on other sites More sharing options...


Recommended Posts
Ford UK Shop
Sponsored Ad
Name: eBay
Ford Model: FordUK Shop
Ford Year: 2024
Latest Deals
Ford UK Shop for genuine Ford parts & accessoriesDisclaimer: As the club is an eBay Partner, The club may be compensated if you make a purchase via the club
Join the conversation
You can post now and register later. If you have an account, sign in now to post with your account.