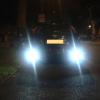
Brigante Posted December 9, 2012 Share Posted December 9, 2012 This is my 5th attempt at a guide and a photo heavy one at that. This time, it's on how to wire in a reverse parking cameraIf you've seen my guide to installing an aftermarket head unit, you'll know I recently fitted a touch screen head unit.I'll now show you how to wire in a backup camera to make the most of having a touch screen.There are various types of backup cameras available, just look on eBay and you'll see what I meanhttp://www.ebay.co.u...cat=0&_from=R40The main ones being something like these that you can mount anywherehttp://www.ebay.co.u...=item27c7d6791fhttp://www.ebay.co.u...=item3f1151b177But will require drilling holes into your boot lidSomething like this that has the camera built into a number plate light unithttp://www.ebay.co.u...=item3a78c4bd69Or even things like thishttp://www.ebay.co.u...=item4849b9a254Which is a number plate holder with a built in camera. This will still require a hole drilling but it'll be hidden behind the plate holder. I reckon this will be the best camera as it positions the camera in the middle of the boot lid for optimum results.Personally though, I went for the camera built into a number plate light, as it requires no drilling, and makes for a very neat install and looks as close as you'll get to an OEM number plate light and looks tidy.Whatever camera you go for though, the installation will be pretty much the same once you've mounted it to the boot lid.Whatever you get should also come in 3 partsThe cameraAnd 2 lots of wires, a 6metre video wire with a yellow plug either end, and a 1.5metre twin core red and black wireThe first step of the installation, is to remove the inner boot lid trim. This is a simple job of unscrewing these 2 screwsFrom each of the handles of the trimNext job is to simply unclip the trim, so get a flat blade screwdriver under the trim and pop it out.It will then be easy to simply pull the trim away from the boot lidNext bit of trim you need to remove is this bit at the top of the boot lidJust grab a hold of it and it'll pull off easilyNext step for me, which only applies to this type of camera was to remove a stock number plate light2 screws then pull it outThen it simply pull the wires from the prong thingsYou can now just put this aside as a spare should you ever need to revert back to the stock light, or sell it on if you want to.Next job is to wire the built in light of the cameraInto the old number lights live and earth feedsMost people use splice blocks for this, but I personally think as long as you well insulate it, you can just splice the wires straight together.So first I got my stanley and peeled back some of the plastic coating behind the plug of the earth wire to expose some of the copper wire insideI then tightly wrapped the copper wire of the new number plate light around itI then taped it heavily in insulation tapeAnd also taped up the plug itselfThen for extra insulation I cocooned it in fabric loom tape alsoNext I repeated the process for splicing the live wires togetherAt this point I turned my side lights on to check the built in number plate light of the camera actually workedIt's hard to see in this photo but it is lit up so I then repeated the process of heavily insulating the live wireNow it's time to thread all the wiring, including the other wires if the cameraUp through the hole for the number plateYou can now screw the camera/number plate light in placeNow depending which type of camera you went for, be it a universal one or the number plate holder, the rest of the guide will be the same whatever camera you haveNext job is to route the wiring around the boot lid, so what I did is tape it to the existing wiring already in the boot lid for neatness to keep it all togetherOnce you get to hereIt's time to plug the long 6 metre video cable with yellow plugs either end, into the yellow plug of the cameraIt's this wire that will route all through the car and plug into the headunit/monitorThe next trim piece doesn't need to be removed at all as you can simply took it in around the edgesTrace the wire round round the edge of the trim piece, tucking it in all the way round till it comes out the bottom (top of the boot lid)Repeat the process for the short 1.5metre black and red wireIt's this wire that will go to the reverse light so the image will be displayed when reverse gear is selectedNow you have to remove the trim pieces in the boot, starting with this big pieceIt's held in by 4 of these poppersSimply get a flat blade screw driver under the edge and pop em out. Once all 4 are out the way, just grap a hold of the trim piece and pull to unclip itNext there is a smaller trim piece either side of the bootAgain, simply pull to unclipAnd the other sideAlso the 2 screws of the top trim pieceOnce all that lot's out of the way, you'll be able to pull and unclip the trim piece around the top edge of the bootNow you need to locate the rubber conduit joining the boot lid to the carAnd pull it outNow pull the long video wire through it's hole in the boot lidNow pull the other end of the conduit out the carYou now need to pull the video wire through the conduit. This is known to be !Removed! hardTo make it easier, get a section of wire coat hanger and slide it in one end of the conduitRoute it right the way through and out the other endNow you need to tape the video wire tightly to the end of the coat hangerThing is, I don't see any way of pulling the video wire through the conduit with the plug intact as it's just way too tight.Either that or I just haven't got the patience. I did try but it just wouldn't happen and it just kept pulling off the coat hangerSo what I did was cut the plug off completely, leaving a few inches of wire on the end of it. And look what wiring was inside the black video wireI found 3 different colour coded thin wiresBy cutting the plug off, I taped the wire to the coat hanger and pulled it through the conduit with easeIt's now time to repeat the process with the reverse light wireThing is, the length of the reverse light wire provided with the camera is nowhere near long enough and will need extending by a couple metres. So you will require an additional length of twin core wire.Simply splice the extra length of wire to the reverse light wire providedBlack to blackRed to redThen insulate heavily with fabric tapeYou can now tape this wire to the coat hanger and pull it through the conduit with easeNow you need to pull down the roof liner slightlyAnd thread both lengths of wire into the carNow you can refit the conduitNow you need to sit in the back of the car, push up the roof liner a little bit and pull the wire throughYou'll notice in the above photo it's wrapped in loom tape, this is because like an eejit, I some how managed to pull the wire back out the rubber conduit previously, and when pulling it back through again, I managed to pull it too hard and rip the wire in half completely so my video wire is spliced together in three pieces all together. Still working though.Now for routing the wire around the car, I found a very easy and simple route, is around the door seal. So further removal of the roof liner isn't really required at all making it a nice and easy routeSimply took it in as you go along and you'll never know it's thereContinue routing it right along the edge of the roof liner tucking it behind the door seals and pillars, then right around the passenger side door seal down to the foot wellWhen you get to this point, you need to partially unclip the trim piece, simply grap a hold of it with your finger tips underneath and gently pull away from the car to unclip itThen you need to thread the wire behind itAnd pull it out the other sideThen you can clip the trim piece back in placeNow you need to remove your glove box, so open it, and there is a total of 7 screws to removeThe whole thing will then simply pull out and you will be looking at thisYou then need to thread the wire up through a gap and pull it throughNow in my case, this is when I had to splice the plug back onto the wireSimply match all the other up and splice the exposed copper wire togetherAll doneNow wrap in fabric tapeNow you need to remove you head unit, and thread the wire from where the glove box wasAnd pull it through where the head unit wasNow it's time to go back to the bootWith the extended twin core reverse light wire, Thread it down behind the trim pieceAnd out the bottomWhat I then did was route the wire around the spare wheel well to the other side of the boot, where I lifted up the carpet and located the reverse light live wire among this lotI removed the black tape holding it all together. It looks like a mass of wires, but it's easy to locate as the reverse light wire is green/orange. There's only 2 green wires in this lot, green/orange and green black.So the reverse light wire is easily distinguished from the rest.I looked under the car to confirm thisCrap picture as the flash on my camera distorted the colour lol but it is definitely green/orangeSo what I did is splice the earth wire for my camera into one of the 2 earth wires of the mass of wires, then spliced the live wire into the green/orange wireI then plugged the video wire into the back of the head unit. The camera input should be marked RC INAt this point I thought my work was over and it was all wired up. I tested it by getting in the car, starting it and put it into reverse gear..Only to find that it didn't !Removed! work Didn't get why as I'd definitely spliced into the reverse light live feed, and it was correctly earthed.I made sure the wires was definitely plugged in properly and it still didn't workI then undone the taping on the wires I'd spliced on the video wire in case one had pulled apart, only to find they was all definitely spliced together nice and tightI had a head scratch, undone the splicing in the boot, routing the wire temporarily out of the boot over the bumper, and spliced into the live and earth wires of the reverse light under the car directly behind the bulb holderTested it again, and this time it worked perfectly and the image appeared on the head unit screen, so I knew all my wiring was perfect and the camera was workingI then undone this temporary splice, and spliced it back in the boot. Tested it again, and it didn't work I then though maybe I'd earthed it into the wrong earth wire, didn't get how this would matter as they are all earth, but I tried it anyway and spliced into the other black earth wire of the lot. Tested it again and it still didn't work.This really confused me, so I spliced into it outside of the car again behind the bulb holder, tested it and it worked normally again.At this point I got really pee'd off and was running out of time and day light, so I taped back up and insulated the wires I'd partially stripped in the bootThen located the rubber thing on the passenger side of the boot with no wires going into itI then pierced a tiny tiny hole in it with my stanley so it's still pretty much water tight, and threaded the wire through it(the other wire is for my second boot light)And pulled it through from underneath the car behind the bumperI then spliced the wire permanently into the reverse light just behind the bulb holderThen heavily insulated with fabric tapePhoto from underneath the carFinally it's job done so now just refit all trim pieces in reverse of how you removed emAfter a lot of work, here's the results of all your hard workTook this photo in tesco car park after I went to get food in with the MissusAnd here's a little video of it in action (night vision so not a very good one) Hopefully this very long photo heavy guide will be of use to anyone planning on fitting a reverse parking camera.May seem like a lot of work involved but it's all relatively straight forwardIf you need to know how to install an aftermarket touch screen head unit to connect the camera to, see my other guide which can be found in my signature bellow.Thanks for reading 3 2 Quote Link to comment Share on other sites More sharing options...
Stoney871 Posted December 10, 2012 Share Posted December 10, 2012 Jobs a good un! :) Quote Link to comment Share on other sites More sharing options...
lazzymonk Posted December 10, 2012 Share Posted December 10, 2012 Nice work. My only suggestion would be to get a soldering iron and solder all the connections. Twisted wire connections can cause all sorts of headaches down the road. Oh and heat shrink. it makes a nice water proof connection too. But still nice work. Quote Link to comment Share on other sites More sharing options...
liam-20 Posted December 14, 2012 Share Posted December 14, 2012 Good how to I've bought a camera from Hong Kong not got it yet but on the back of your camera how many wires came out of it the one I've bought only seems to have 2 coming out of it?? Quote Link to comment Share on other sites More sharing options...
Brigante Posted December 15, 2012 Author Share Posted December 15, 2012 Good how to I've bought a camera from Hong Kong not got it yet but on the back of your camera how many wires came out of it the one I've bought only seems to have 2 coming out of it?? Mine has a total of 3 wires coming out of it mate (depending how you count em) One is a twin core red and black wire, that is'nt connected to the camera itself but to the led number plate light. Then it's got 2 more wires coming off the camera itsef. One with a yellow plug on that the 6metre long video wire plugs into. Then the other wire has a red plug on it that the 1.5metre reverse light feed wire plugs into. You can clearly see the wires I mean in the guide mate. 1 Quote Link to comment Share on other sites More sharing options...
Brigante Posted December 15, 2012 Author Share Posted December 15, 2012 Bit of an update on the camera. I have added a bit more wiring, so it's now also wired to a switched live on ignition feed. So now the camera doesn't only have power when reverse gear is selected, but has a permanant live feed when the car is turned on. So that the camera isn't permanently on though I have also wired it to switch which I have conveniently installed in the obd pocket for easy reach while driving. This means not only does the camera automatically turn itself on when in reverse gear, but at the flick of a switch it can also be turned on while driving forward. For use when visibility out the rear window is reduced like when it's taking its time defrosting in this weather for example. Or keeping an eye on a trailer if u was towing one. Or if i was to get the back window tinted. Or even just to see how close some eejit in an audi is tailgating me. Overall I must say I am very pleased with this new bit of wiring and it really makes the most of having the camera. If anyone else would like to do this extra bit of wiring so that the camera can be used at any time and not just when in reverse gear I will be able to guide you though it. I would have took a few photos while doing it but it was gone 11 at night when I got the random urge to do it and the battery was low on my phone so the flash wouldn't work. 1 Quote Link to comment Share on other sites More sharing options...
gc88 Posted December 15, 2012 Share Posted December 15, 2012 Good work! Looks relatively straight forward! Do the insurance company charge any more, or does it not need to be updated? Quote Link to comment Share on other sites More sharing options...
Preee Posted December 15, 2012 Share Posted December 15, 2012 Brig with your Perm live on Ign , add a relay so that you don't forget and end up with 2 live feeds if you forget to switch it off when selecting reverse. That way if you forget the relay will kick in when reverse is selected and turn off the live feed. Quote Link to comment Share on other sites More sharing options...
Brigante Posted December 15, 2012 Author Share Posted December 15, 2012 Actually Preee mate, If you saw my last post forget what I said lol. I think I will install a relay. Be a gent and link me to the type of thing I'd need on eBay please mate? I'll get one orderd soon. Quote Link to comment Share on other sites More sharing options...
Brigante Posted December 16, 2012 Author Share Posted December 16, 2012 Here's a better day light video of the camera in action using my newly wired in switch (the glare on the screen is from the flash on my phones camera) Quote Link to comment Share on other sites More sharing options...
Preee Posted December 19, 2012 Share Posted December 19, 2012 Here is a link to the relay you need , this one come's with wiring harness http://www.ebay.co.u...=item5d3350eb86 PIN 85 - Live feed from your switch PIN 86 - separate Earth PIN 30 - Live feed to your camera PIN 87a - Feed from your reverse light PIN 87 - Live Feed from Your switch ( so 2nd Live feed from your switch) Wiring it like this will , place the 2 feeds on different circuits stopping any chance to Voltage leakage into the reverse circuit which may be whats happening now with your CC. Pins 85 / 86 are the relay switch 86 being earth once activated this will switch relay between pins 87 and 87a , of which default pin87a connected to your reverse light. once the live switch is activated , it will activate the relay to switch to PIN 87 (direct power to your camera) and no back feed power into the reverse circuit. You can loop Live power off the switched live or you can use another live feed. i would also make sure the camera earth is not connected to the reverse light earth , but to car ground earth. You will end up with two separte circuits. If this does not stop the CC from being cut off during rear cam manual activation then , i'm not sure what could be the problem. ALWAYS - double check the diagram on the relay before following my above guide as some relays are slightly different. Quote Link to comment Share on other sites More sharing options...
Brigante Posted December 19, 2012 Author Share Posted December 19, 2012 where exactly should i place the relay mate? like where in the dash that would make for the easiest wiring Quote Link to comment Share on other sites More sharing options...
Preee Posted December 19, 2012 Share Posted December 19, 2012 where exactly should i place the relay mate? like where in the dash that would make for the easiest wiring that would depend on. Where have you made the connection for for the switch to the camera ? if it's in the boot then the relay can go in the side panel of the boot. If it's near the dash then you can place the relay behind the dash. But i would find direct earth points for the camera and the relay. Only use the live from the reverse light and split the live from the switch , one for the action of the relay and the other live feeding the camera on pin 87 , that way when you select reverse it will go straight through pin 87a and activate the camera , and when you use the switch it will switch power to pin 87 and remove power from the reverse feed. This way , two seperate circuits and neither one can can upset the other even if you select reverse while you have the switch turned on. The way you have it now , it could be sending power down the reverse circuit and if you double that up by turning the switch on you could damage either the camera or the reverse circuit. like i said you can test this by removing the reverse circuit including the earth connection and going out for a drive , then test your CC . It your CC stays on then you know the relay will work. But i would go the relay way anyway due to the fact of two possible live feeds hitting the camera. Quote Link to comment Share on other sites More sharing options...
Mike77 Posted January 3, 2013 Share Posted January 3, 2013 Firstly, what the hell are you listening to haha. Mine is all up and running now, but my camera doesn't have that weird grid thing yours has lol. I'm not happy with the fitting kit surround that I got, its very cheap, others say it looks fine, bit I'm already planning to replace it with the one piece fascia that incorporates the holes for the heaters etc. The radio itself is great, call quality from the bluetooth is great, auto connects within 10 seconds of getting in the car, will also stream music from my phone through bluetooth. Sound quality is much better than the standard unit, also fitted my sub seeing as i had most of the car apart lol, so now have bangin tunes. USB works great, and even plays movies through that :-) will upload pics from my USB, and I can then use them as backgrounds for the headunit. Removable front is bulky, but puts my mind at rest with all the low life scum about that wouldn't think twice about thieving it. All in all I'm very impressed with my work, and the units capabilitys. In your video, is your unit fitted or hanging through the back of the dash, I know you said something about a dummy front being used, but don't think my OCD would let me live with that lol. Quote Link to comment Share on other sites More sharing options...
Brigante Posted January 3, 2013 Author Share Posted January 3, 2013 :o don't tell me you ain't heard of the black keys mate!? They brilliant. I think the grid on my camera is good mate, helps you judge how close you are and when to stop reversing. By the fitting kit surround do you mean the fascia adaptor mate? Yup i admit mine looks cheap, but i need it to be able to mount my faceplate to it using velcro lol, so i aint bothered how it looks if it stops me stereo getting knicked. I can always paint or hydro dip it anyway. Too be fair i'm really not fussed about not having bluetooth, i've neve used it so i'll never miss it lol. I'm happy with having me music on a diddy usb that sticks out the front by about 4mm so it would never bother me or get in me way. Must say in terms of sound quailty the built in amp is brilliant, really gets the best out of the stock Speakers n watching a film is like sitting in the cinema. I can set photos as the wallpaper too but havent bothered yet. Even though you have the removable faceplate, you still may wanna think about a dummy faceplate also mate. As savvi scum will see you've removed it, and immediatly know its expensive enough to have a removable faceplate, so theres still something worth knicking in the dash. So they'll still nick the bulk of the stereo out the dash, then stroll into halfrauds n lift a faceplate of a display model. When you say fitted or hanging out the back, are you on about how its not flush with the head unit surround? As yup its fitted, but what i've done is trim a bit of the edges of the back of the fascia adaptor. So that it sits about 2-3mm deeper into the head unit surround. By doing this, when the dummy face plate is in place, the dummy head unit sits flush in the head unit surround. So that it does not randomly protrude out the surround further than it should n make it obvious its just stuck on Quote Link to comment Share on other sites More sharing options...
Mike77 Posted January 3, 2013 Share Posted January 3, 2013 Yeah, i thought it looked a little futher back than it would normally sit. I already wrapped my 2 plastic surround bits, but the bigger of the 2 comes away slightly on the bottom right, were the useless clips they supplied won't grip the console hard enough. Then the finishing trim, it has little teeth to hold it in place on each corner, I did a test fit, but on removing this, most of the teeth wore away. Terrible quality. All the wiring was great, if not a tad to long for what was needed. And as stated earlier, it was a nightmare finding somewhere for it to live grrr lol. Gonna search eBay and see if I can find one of the other fascias to do away with this one soon. Quote Link to comment Share on other sites More sharing options...
Brigante Posted January 3, 2013 Author Share Posted January 3, 2013 Are you sure you have the head unit/cage positioned as good as it could be? As when i first fitted it the fascia kept coming out at the corner. But it was actually from the head unit not being wegded in perfectly. I just kept playing about with the position and wedged it in n eventually the fascia adaptor seatd beautifully. The metal clips hold it in fine, if anything a bit too well as i couldnt get the !Removed! thing back out n ended up snapping 2 of the clips off in the process Quote Link to comment Share on other sites More sharing options...
Mike77 Posted January 3, 2013 Share Posted January 3, 2013 Yeah its deffo in as good as its gonna get, its not gonna go anywhere, but looking at it, I'm not impressed, like I said, others can't find fault, but my dam OCD is saying it would look better with the complete fascia rather than the adaptor surround which is in there now lol. Quote Link to comment Share on other sites More sharing options...
Brigante Posted January 3, 2013 Author Share Posted January 3, 2013 Nah i do agree mate, i'd rather have the proper head unit surround with an actual double din sized hole in it so there would be no need for the fascia adaptor. But i wouldnt be able to mount my dummy head unit to it so i'm sacrificing a bit of asthetic looks for piece of mind that it won't get nicked. I know its not to your liking but i actually think it was a genius idea me trimming the fascia adaptor so it sits in a few mm deeper. When i get round to it i'm gonna redip all the dash pieces (head unit surround etc) in a darker base colour to look more like carbon, so when i do i'll dip the fascia adaptor too so it'll all be the same colour n blend in better. If you want i could always dip some parts for you too if you don't like the look of the wrap lol 1 Quote Link to comment Share on other sites More sharing options...
Mike77 Posted January 3, 2013 Share Posted January 3, 2013 Thanks very much for the offer mate, but I actually lo e the look of the wrap, especially when I managed such a goof finish first time haha. The idea of the new fascia has been strengthened by the fact that were the new surround sits, then the radio being shoved in, has actually started to slightly push the carbon wrap in a couple of corners on the actual dash/radio surround. So it just won't do, and a new one will be ordered and wrapped accordingly lol. Also going to research if its possible to wire the camera without a switch so I can use it while driving. Use of a relay will be incorporated somewhere. Just want it to act as it should in reverse, but be able to select camera on the unit while driving and have it operate that way. Quote Link to comment Share on other sites More sharing options...
Brigante Posted January 3, 2013 Author Share Posted January 3, 2013 I'm trying to suss out a new way of wiring the camera up to be used while traveling forward too. I thought by wiring it to a perm live on ign feed but having the camera turned off in the menu might be enough, but it wasnt as even if the cameras turned off in the menu, the camera was still permanantly on. Which was why i added the switch to cut the power from the perm live. Quote Link to comment Share on other sites More sharing options...
Davinder Sangha Posted January 26, 2013 Share Posted January 26, 2013 Hi, just hijacking this thread. I have a Fiesta, but the principals in installing seem the same. My problem is that my camera has an extra set of wires. http://www.ebay.com/itm/FORD-Fiesta-Car-Backup-Parking-Reverse-Reversing-Security-Rear-View-Camera-/190664950248 So, instead of a video connection and red power connection. It also has another power wire which is open ended. I did actually test the unit with a 3 pin plug charger and it worked fine, without the need to connect the extra exposed wires to any power. I'm going to give it a go again and splice some of the wires coming out of the car. The wires coming out of the car are two wires connected to the light (orange/black and black) plus there is an unused one which is also orange/black. Any help is appreciated. Quote Link to comment Share on other sites More sharing options...
Brigante Posted January 27, 2013 Author Share Posted January 27, 2013 What wire are you on about exactly? Looking at the pictures it has the correct 3 wires. So going by your post i'm assuming your asking about the power cable for the number plate light? If so, i explained in detail in the guide how to connect this wire, in fact its the first wire i showed what to do with. You simply need to unscrew and remove an existing number plate light, and splice the new power cable into the existing number plate power supply as i did in my photos Quote Link to comment Share on other sites More sharing options...
vince_13 Posted March 10, 2013 Share Posted March 10, 2013 hi brig hopefully you might be able help me ive bought a similar reverse camera to yours, however mine is wireless (trans from the boot recvd at the dash) i fitted it to the boot, usng a number plate light, spliced the old wiring for the led and also spliced the same light wiring for the power to the transmitter (subsequently the camera only opeartes when the side lights are on, that the boot done now to the front, all i needed was a 12v feed, i took the yellow 12v and the black grnd for the stereo to power the receiver, now the problem is the camera operates when NOT in reverse, when i go into reverse i get a black screen when it should show a display what socket did you put the yellow connector into? mine is currently in AUXin as it doesnt work in CCDin any thoughts? Quote Link to comment Share on other sites More sharing options...
Brigante Posted March 10, 2013 Author Share Posted March 10, 2013 alright vince mate going by what you've said, none of it is actually connected to reverse gear so the head unit doesnt have any way of knowing when reverse gear is selected dunno about yours but on the back of my head unit theres a socket marked rc in, this is what the yellow connector goes into also my wiring loom theres a wire labeled reverse gear signal input, this wire had to be connected to the reverse light so that the head unit knows when reverse gear is selected Quote Link to comment Share on other sites More sharing options...


Recommended Posts
Ford UK Shop
Sponsored Ad
Name: eBay
Ford Model: FordUK Shop
Ford Year: 2024
Latest Deals
Ford UK Shop for genuine Ford parts & accessoriesDisclaimer: As the club is an eBay Partner, The club may be compensated if you make a purchase via the club
Join the conversation
You can post now and register later. If you have an account, sign in now to post with your account.