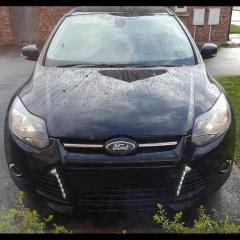
Phil21185 Posted June 13, 2017 Share Posted June 13, 2017 I never usually do this but I've never really had a car worth posting about before. I've recently become the proud owner of a 1.6 TDCI Ti Nav in Panther Black and I love it! I still want to bugger about with it and I want to put together a list of mods I want to do and stuff I want to buy (more for keeping track myself than anything else) and I'd appreciate any opinions, recommendations and links people may have. Firstly, there are some givens. Mine has the auto mirror and rain sensors but the upper section of the cover is missing. Didn't spot this before buying due to the way I was sat but I have to say it's niggling! If anyone has the part number I'd appreciate it! I also want to get some decent mats, preferably rubber but obviously fitted for the studs in the floor. Also a boot liner (hatchback). I'll be replacing as many bulbs as possible with LEDs, though I have read a lot of reliability issues with some sidelights. After those, the rest are in the 'maybe' pile I quite like the idea of wind deflectors but don't want the Halfords-Nailed-On look. Opinions? Illuminated gear knob would be nice (working on that one), maybe even the scuff plates... Bonnet lifters Reverse camera Front parking sensors (can be retrofit?) Some nice looking pedal covers DRLs. Preferably oem but price would probably mean 'fang' style Colour changing ambients. Following another thread I think this is possible Front window tint 18" alloys to replace my 16's Front bumper lip. Remap. New front and rear badges ( rear is going white round the edge and front has one hell of a stone chip - I read somewhere dealers replace these for free on less than 10 year old cars?) topped with gel coats. LED reflectors. I've seen this done with twin intensities for side and brake lights. Dunno how much of this will ever get done but it's nice to have a list! I also have a couple of questions if anyone can answer: Can the SYNC voice control be programmed to activate my phone directly? Or can the command choices for SYNC 1 be improved with a software update? Is there a way to re-calibrate the trip computer? My instant mpg is nearly always 99.9 when cruising at any speed and only drops when accelerating hard. £20 of fuel apparently buys me 700+ miles... What is the button nearest the driver for below the air con controls? I'll put up a pic if needed but the one I mean is next to the disable start/stop button in the same bank as the front and rear window heaters. It's blank in mine but I'd be interested to know if I can put whatever it is in! Heated seat maybe? Quote Link to comment Share on other sites More sharing options...
craskie Posted June 14, 2017 Share Posted June 14, 2017 Hi Don't know if its any help but I'm planning on creating some electronics and code to work with the CAN system. Early days yet but I intend to use the rpm signal to turn on/off aftermarket front parking sensors after selecting reverse. And go off when you go over 5mph etc. I really want colour changing ambient lights rgb including the gear knob. Not sure if I will integrate this with the CAN. I have a push button start and the car knows when the key is in range to start so I plan on making the start/stop button flash when start is available. Also plan on making the fog lights come on when steering left or right. I hope to keep it all looking OEM Its a Mondeo titanium 62 plate. So not all directly helping you I guess but the RGB side of it might Thanks Andy Quote Link to comment Share on other sites More sharing options...
Phil21185 Posted June 14, 2017 Author Share Posted June 14, 2017 Nice! Some of that sounds juicy! Yeah I have keyless start as well. I personally wouldn't mind the front sensors on all the time, unless that puts the visual part up on the MFD too. I think fogs when cornering is already possible, or at least it's in the handbook. Sounds like something that could be done with an elm? I mentioned about illuminated gear knob and over in another thread I was asking about a mk2 one I've found for £30. Think I'll update here and make this my 'build' thread. So the mk2 knob turns up today and I have a fiddle. I want to change the red leds to blue which shouldn't be a problem as I've popped the cap off and underneath is a small board with 4 smds. The other problem is the lifter for reverse. It has to have it's own lifter (ie I can't just swap the heads over) as the diameter of the lifter is larger on the mk2. It's also taller as it fills in a sort of cut-away in the front of the knob (pics coming). It'll all interchange OK but the gaiter clamp on the underside has a different way of connecting to the lifter mech so that'll need a bit of thinking about. If it saves me £70 for an identical result I'll be chuffed. Other than that, got a set of cheapo leds for puddle lamps and boot lights and I'm pretty pleased with the results. Especially as all 4 cost only £6. As they're not on all the time I don't mind trying cheapies for now. I notice the boot lights don't have reflectors so single sided 501s might be better there. Looks OK at night though and a helluva lot nicer than the 'cands. Next will be crees for reverse and if anyone can point me to some decent led for the mirror indicators I'd be a happy bunny Quote Link to comment Share on other sites More sharing options...
mike6688 Posted June 15, 2017 Share Posted June 15, 2017 I'm quite interested in following your build, as looking to do some of the things you're planning myself. In particular OEM DRL's and if possible activating the fogs as cornering lamps - would love that to be possible! Quote Link to comment Share on other sites More sharing options...
Phil21185 Posted June 15, 2017 Author Share Posted June 15, 2017 10 hours ago, mike6688 said: I'm quite interested in following your build, as looking to do some of the things you're planning myself. In particular OEM DRL's and if possible activating the fogs as cornering lamps - would love that to be possible! Thanks for the interest Mike but I wouldn't hold your breath! With the cost of new OEM drls a bit on the prohibitive side for me atm, it'll likely be the 'fang' ones or being lucky enough to snag some from a cat b that wasn't a front ender. As for fog turners, I know I've seen that in the handbook so I'd imagine it'd be enableable with an elm... Anything I do do will go here though =) I've sorted the connection problem for my mk2 illuminated gear knob and I've ordered some blue leds to swap out the red ones. Only hope I've got the right brightness. I went for the 1560mcd ones thinking that since the voltage drop for blue leds is higher, they'll be dimmer anyway... EDIT: quick thought - has anyone seen oem drls for sale without the sails? So you actually fit them yourself and not just swap the sails over? Quote Link to comment Share on other sites More sharing options...
Micro Posted June 16, 2017 Share Posted June 16, 2017 On 2017-6-14 at 2:32 PM, craskie said: Hi Don't know if its any help but I'm planning on creating some electronics and code to work with the CAN system. Early days yet but I intend to use the rpm signal to turn on/off aftermarket front parking sensors after selecting reverse. And go off when you go over 5mph etc. Thanks Andy There is a can signal for reverse, it is used by the can interface box for my android radio. I also found it when I was doing some CAN interfacing with an Arduino. Quote Link to comment Share on other sites More sharing options...
JamesMalin Posted June 16, 2017 Share Posted June 16, 2017 A lot of those are pretty easy and in expensive.I bought new Ford Focus luxury mats, door sill protectors, number plates, mud flaps, sport aerial and LED Bulbs from eBay.All from eBay shops that forum users have suggested.Happy with all of them so far!Next up is a SuperChips ecu remap and giving my car the rain sensor/auto lights/dimming rear view mirror again all bought from eBay/Ford and help from these forums.Was tempted to get some 18" alloys my my standard Zetec 17" alloys are growing on me!Sent from my iPhone using Tapatalk Quote Link to comment Share on other sites More sharing options...
Phil21185 Posted June 17, 2017 Author Share Posted June 17, 2017 On 2017-6-16 at 6:34 PM, JamesMalin said: A lot of those are pretty easy and in expensive. I bought new Ford Focus luxury mats, door sill protectors, number plates, mud flaps, sport aerial and LeD bulbs from eBay. All from eBay shops that forum users have suggested. Happy with all of them so far! Next up is a SuperChips ecu remap and giving my car the rain sensor/auto lights/dimming rear view mirror again all bought from eBay/Ford and help from these forums. Was tempted to get some 18" alloys my my standard Zetec 17" alloys are growing on me! Sent from my iPhone using Tapatalk Yep. Planning on starting small and saving up for the good stuff! I wouldn't mind a few pointers to reliable eBay sellers for this stuff, but I certainly don't mind digging about to find the info. Good luck fitting your sensors. If you find out, could you please let me know what the part number is for the two-piece cover for the sensors and wiring? Mine was missing the upper half when I bought it... Quote Link to comment Share on other sites More sharing options...
Phil21185 Posted June 21, 2017 Author Share Posted June 21, 2017 Right. I've finally managed to convert and fit the illuminated gear knob from a Mk2 into my Mk3! Yay! I've not got it hardwired in yet, but tested on the points its gonna be soldered to and it works fine! The only reason I did this was because I found a 6-speed illuminated knob for a Mk2 on eBay for £30 and its almost identical to the Mk3. Backlight colour was red but as I say I've managed to convert this fairly easily with some cheap blue SMDs. I'll put a full write up and links just in case folk happen to do the same (which I guess is fairly unlikely) but it may help if people want to change the colour of their OEM 'luumies... Happy bunny today 2 Quote Link to comment Share on other sites More sharing options...
Phil21185 Posted June 23, 2017 Author Share Posted June 23, 2017 Ok I promised a write up and here it comes. It's a lot of photos and probably not explained very well, but I hope someone will find it useful. Also, as I said before, It's probably really unlikely that others will do what I did (I think most will just buy the correct thing to start with!) but it may help for those with lift-reverse or just want to change the colour of their LEDs. So here goes. New Mk2 illuminated knob. After taking the lifter and spring off - it comes with a clip on the cable which needed undoing to thread the cable through. Popping the cap off was a delicate process. I did it with a small screwdriver round the top between it and the leather but be sure to protect the leather with something. The gear markings and LED board. Gently prise the clips apart and the board comes out. Stock LED board touched onto a 9v battery. Definitely not blue... Me + soldering iron. Not the tidiest soldering job I've done but these are pretty small! Would not light with a 9v battery as blue LED voltage drop is higher than red so this is 19v laptop supply =D LEDs required are 3528 type (3.5 x 2.8mm) PLCC4's (4 contacts - 1 positive and 3 common negatives to aid heat dissipation). The 2 contact ones (PLCC2) could overheat. I used these: Blue PLCC4 3528's from the Bay of e. Knob reassembled. Pretty chuffed with the colour match! Now. Because the Mk2 knob has a sort of cutaway on the front of it, it needed to keep its taller lift collar to hide this, plus the diameter of the Mk3 lift collar is smaller. Problem with this was that the connection to the lift gate is different from Mk2 to Mk3. Soo... Mk3 connection to lift gate. My (kludgy) modification to the Mk2 lifter. The upper piece is 8 gauge steel (lying around at my work =]) It was fairly tight in the plastic but to make sure it didn't move, I put a bolt with some square nuts through behind it. I ground a small dip in each of the nuts to house the steel. Does the job =] Now to dismantle the car. Very easy to feel like the gaiter surround is going to break. Hook your fingers round the middle of the drivers side of the surround next to the shifter (ie. through the leather gaiter) and pull up. One clip in the middle should release like above. Then get something plastic (or wooden in my case) in that gap and work it front to back to release the other clips. After this, the whole side will lift, then gently work your way around. They ARE stiff, but just be careful not to snap your surround. Pop the connector off the stock lifter. and here is my kludged Mk2 lifter re-attached. I had to make the hole in the top of the gaiter a bit bigger but the upper and lower pieces clipped together fine. When fitting the knob, the whole assembly including the gaiter has to be turned with the actual knob or the cable will become wrapped round the shifter. I imagine this will be the same for the OEM Mk3 'luumy knob. Once the knob is tight and aligned properly, this lifter connection can be attached and the gaiter replaced. I found it helped to hold the lifter up while turning the knob the last few turns. Crap! I just realised I didn't take any pictures of the wiring in but basically I followed another guide I think on Focus Fanatics. Briefly, I took the passenger knee panel off the side of the centre console then unclipped the loom nearest the armrest. Its the one with a white clip/arm which has to be undone to release the plug. The orange wire I spliced in to wire no10 (plain brown in the loom) and the black I spliced into a plain black return in the same loom. I understand that the install instructions say to attach the black to an earthing point near the passenger door. My knob also didn't come with the extra wiring which I think includes an inline fuse, but my install seems to be fine. Before. Finished. Daylight pic but still shows up well. A bit of soldering and problem solving (always the most fun part I think!) and I've saved over £60. The knob is taller than the non illuminated by about 1cm or so but is quite a bit heavier so makes shifts feel more fluid and positive. Happy Days 5 Quote Link to comment Share on other sites More sharing options...
JamesMalin Posted June 25, 2017 Share Posted June 25, 2017 Good work! :D 2 Quote Link to comment Share on other sites More sharing options...
Phil21185 Posted June 26, 2017 Author Share Posted June 26, 2017 Thanks! Always nice when a plan comes together =] 1 Quote Link to comment Share on other sites More sharing options...
Phil21185 Posted July 29, 2017 Author Share Posted July 29, 2017 Just a little one here - some new pedal covers. Not much range to choose from on the Bay of e but these look better than stock but less than boy racer so all good. Also converted my footwells to white as you might notice! Actually they're not painfully bright, although the time of year means I haven't driven the car at night yet... I want to take that sticker of my accelerator but actually you can't see it from driving position... 1 Quote Link to comment Share on other sites More sharing options...
Phil21185 Posted July 29, 2017 Author Share Posted July 29, 2017 Joy and frustration today (well, that's cars, innit!?) Got my DRLs through =] time to leave the wife alone for an hour! Sorry but yep, they're the 'fang' style not oems (£230 can be better spent!) These were £35. The same ones are available for even less on eBay but come from China instead of their UK warehouse so you have to be patient for them and I'm....not. Well, I THINK they're from china anyway... Mmk, definitely from China. Couldn't help seeing what the other options were! I love the literal translation for indicators - "Lose one's way" =]. Also, what would the third colour be?! Connected via the box and a 9v battery. Fook they'll do! First job is lights out. Gives much needed room to move. Two T25 torx bolts on each light, front and back. Don't forget the loom connector. Get a thin butter knife and wrap it in at least 2 layers of something like a duster, then just gently work it in where those clips are and lever out. Start at the top and work down one side, then from the top again, down the other. Then across the bottom and they'll pop straight out. "Gat-tothed was she..." Notice the gray poly behind the drivers side one. If there was ever any behind the passengers side that's long gone. Drivers side one will have to come out to give space for the led unit, which is thicker than the sails themselves. Of course OEM's sit across the bottom... That poly also goes behind the little panel for the towing eye and actually around the towing eye itself. I cut it away to leave some behind that panel, so basically, I just removed what you can see. Loom for the DRLs, These are the 3 wire kind so there's a signal to go to the headlight for 50% dimming. Headlight loom in blue there. Shiny black is the DRL loom taped to the cars existing wiring. Don't shout at me, brown tape was all I had and not very much of it, but you can bet your botty that'll be swapped for black. I always try to run new wires where there are existing ones to be sure they're not going to foul anything else. This is behind the front badge really, from the passenger side looking towards the drivers side. The DRL box is currently sat on foam which in turn sits atop the radiator. I glues that box to the bottom of the plastic above so it wont get too hot. Actually there aren't many choices for placing this as the wires from it to each DRL are equal length so it has to sit somewhere in the middle... @madmoleStephens guide on fitting Nolden OEM's has the official instructions which say to use a fuse tap in F42, which is currently unoccupied. So I gets my trusty fuse tap (also arrived this morning) and then frustration happens... WTF??!!!? What the hell use is that to anybody?!! Bear in mind that the piece of plastic between the metal pins is about 4mm thick. That and those stubby little pins don't even reach the fuse socket before the double fuse holder hits the beige plastic in the fuse box. Pants. This means waiting for the right ones to come before I can finish my project. Waiting for all the parts to come before I begin is fine, but having to leave a job half finished...well let's just say it vexes me. Still, they look pretty sweet even not lit up. Couple of points. While these just snap nicely into place, they do leave a slight gap at the bottom in the middle (more noticeable in this picture on the passenger side.) I think this is just down to a bit of flash left from the moulding so I might take them out and see to that. Also they sort of looked like they are ever so slightly greyer than the original piano black ones while I was fitting them, but actually they looked fine after I had come away and looked again. Even not wired in, they break up the swathe of black across the car's chin nicely I think. Can't wait to get them working! For the price, I can definitely recommend these DRLs, though it would have been nicer if the wiring from the box was longer for the driver's side to make siting the box easier. 1 Quote Link to comment Share on other sites More sharing options...
Phil21185 Posted August 3, 2017 Author Share Posted August 3, 2017 Got them wired in! Positive to fuse 42, negative to ground and switched signal to pin3 in the passengers side headlight loom (purple/green). Lights work beautifully and dim to 50% with dipped beam (my choice instead of with sidelights). Pictures and nightshots to follow =] 1 Quote Link to comment Share on other sites More sharing options...
Phil21185 Posted August 3, 2017 Author Share Posted August 3, 2017 That's dark enough I think. Time for some photos. By the way, the pin I used for the dimming was this one: This is on the passenger side of the car, pin 3 (I think) but the wire is Purple/Green. This makes the the DRLs dim when I turn my dipped beam on, but they stay on full with just the sidelights on. They're honestly not as dazzling as this picture shows but they do look good =] So do the puddle lights =]] Looks MEEEEEEEAAAN! Might have to do something about those nearly yellow fogs though. The lights in the head cluster are all Philips WhiteVision which are about as white as I can legally get. I'm not messing about crossing the line with LED headlight bulbs but does anyone know if the same rules apply to the fogs? I would at least like to match the fogs to the DRLs for whiteness so there's some symmetry. Opinions? 1 Quote Link to comment Share on other sites More sharing options...
vindi93 Posted August 3, 2017 Share Posted August 3, 2017 I have seen led fog bulbs in Halfords. 1 Quote Link to comment Share on other sites More sharing options...
Schmill Posted August 3, 2017 Share Posted August 3, 2017 Looking good!What LEDs did you get for the puddle lights?My car has OEM drl & hid lamps, but the incandescent puddle bulbs look terrible against them!Following this thread with interest; cheers [emoji106]Sent from my MotoG3 using Tapatalk Quote Link to comment Share on other sites More sharing options...
Phil21185 Posted August 4, 2017 Author Share Posted August 4, 2017 It was exactly these. Dang I can't pull the page url from the eBay app but here's the item number. 201667474740 I think these are perfect for this job being COBS, they look like a single large source of light instead of multiple bulbs. Being double sided, they are great for throwing light out directly downwards but also off the reflector. They are a tight fit as they are so large, and don't look very pretty inside the housing, but you're not going to be looking at them from under the mirrors! I did the side repeaters at the same time but I want to change them for similar COB style ones in amber. Only problem is there's a lot less space behind the lens so finding something appropriate has been tricky. I also used the above bulbs in the boot to great effect, though there are no reflectors in those lamps so you could get away with single sided bulbs if you want. Quote Link to comment Share on other sites More sharing options...
Phil21185 Posted August 4, 2017 Author Share Posted August 4, 2017 10 hours ago, vindi93 said: I have seen led fog bulbs in halfords. Thanks, h11s in Philips white vision are about £25 each!! Wasn't spending that when I got h1s and h7s for less than £8 a pair and both sets came with free 501's! I'll look into some led fogs then =) Quote Link to comment Share on other sites More sharing options...
Phil21185 Posted August 4, 2017 Author Share Posted August 4, 2017 As another note to the drls, I haven't experienced any of the interference issues with the radio that others have. Not sure why... Quote Link to comment Share on other sites More sharing options...
vibeone Posted August 4, 2017 Share Posted August 4, 2017 Love this thread - subbed. MK3 2.0 TDCI here but only Titanium so plenty of scope for improvements. I've done the BCM-Hacked reverse camera, Added navigation (didn't even want to use it, just for show really). This thread is helping me with further mods. I've got a set of 17" alloys to replace the 18" (sorry I just dislike the drive). Whats with the hate for the fang type DRLs? I was so tempted to just buy the OEM kit but the cost is just ridiculous. I've got a £39 china special but from an amazon prime jobby so arrived next day and amazon cover the warranty. The guide above is perfect timing since I plan on adding them this weekend. What's the law with rear led lighting? Are they all directly replaceable? 1 Quote Link to comment Share on other sites More sharing options...
Victory Posted August 4, 2017 Share Posted August 4, 2017 great thread! heres mine , not sure what the hate thing is i think they far better than drls on the headlights, i think it makes perfect use of the triangle grills. Only thing i would say about wiring these in is to follow @Phil21185 Guide above do not wire direct to battery as it will reduce the life of the leds due to over voltage.I too have had no interference issues at all.. there are many makes and types of these though so just make sure if you purchase you get the correct ones, i think there are very bad quality ones out there on eBay. next up for me is rear and front parking sensors though am little nervous doing myself and not sure if to go oem 1 Quote Link to comment Share on other sites More sharing options...
vibeone Posted August 4, 2017 Share Posted August 4, 2017 3 minutes ago, Victory said: great thread! heres mine , not sure what the hate thing is i think they far better than drls on the headlights, i think it makes perfect use of the triangle grills. next up for me is rear and front parking sensors though am little nervous doing myself and not sure if to go oem The problem I have with non-OEM parking sensors (on seemingly any car), is that they're utter crap. OEM ones work, eBay specials just seem appallingly bad, get worse, then break. But I can imagine the OEM ones are costly and a pain in the ***** to wire in properly. Like the fangs btw. Quote Link to comment Share on other sites More sharing options...
Victory Posted August 4, 2017 Share Posted August 4, 2017 1 minute ago, vibeone said: The problem I have with non-OEM parking sensors (on seemingly any car), is that they're utter crap. OEM ones work, ebay specials just seem appallingly bad, get worse, then break. But I can imagine the OEM ones are costly and a pain in the ***** to wire in properly. Like the fangs btw. Ive been thinking about getting the OE Style Flush Mount Cobra Parkmaster R0394 fitted, these guys up in birmingham fit them for around £400 front and rear and they do look good! http://poollretrofits.com/parking-aid-systems/ here pictures of them on a focus Quote Link to comment Share on other sites More sharing options...


Recommended Posts
Ford UK Shop
Sponsored Ad
Name: eBay
Ford Model: FordUK Shop
Ford Year: 2024
Latest Deals
Ford UK Shop for genuine Ford parts & accessoriesDisclaimer: As the club is an eBay Partner, The club may be compensated if you make a purchase via the club
Join the conversation
You can post now and register later. If you have an account, sign in now to post with your account.