
Leaderboard


Popular Content
Showing content with the highest reputation on 12/05/2018 in all areas
-
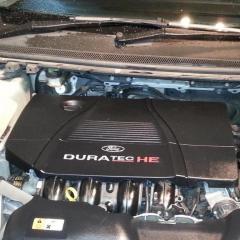
Ok so it seems no-one else has attempted this. In the end I tackled it myself armed with Haynes and a very helpful mate. We followed the advice in the manual and removed the engine from below, first raising the car up on axle stands supported on a platform of concrete blocks. The front of the car needs to be around 2 feet high to get the engine out and back in comfortably from below. To avoid the car being at a very high angle, I reversed it onto service ramps at the rear. In retrospect, the car could have done with being more level than it was as it was quite tricky to manoeuvre the new engine back in place (forward/back space is quite tight and it's hard to stop the engine coming into contact with the intercooler if the engine and car are at different angles). Changing it out was generally reasonably straightforward, if a lengthy process (plenty of hoses and wires to disconnect everywhere!). I would give the following advice to anyone tackling it themselves: Make a note of where the wires and hoses are routed before you remove them. It's not obvious in a couple of instances which way cables are routed around other components when you reassemble In addition to the parts listed by Haynes, I would suggest getting some cable ties including the type that have a plastic serrated stud fixing that secure onto brackets on the engine and gearbox, as I cut a number of these off to release the engine loom Check you have everything before you start. Despite verbal and written instructions along with the description of what I was doing, Ford failed to supply me with what I requested and gave me a set of CV boot clamps instead of the inner retaining clip for the left hand driveshaft Most of the hoses are easy enough to disconnect, but a trick I never knew before and shown by my mate is to break the hold by twisting the hose until it's free before pulling off the mounting barbs (this was a revelation to me!) The EVAP line is all some horrid hard plastic that seems nigh on impossible to remove from the fittings, so I just transferred the whole assembly over from one engine to the other (there are several quick release fittings to mount it to the intake hoses etc which make this job easy enough) By far the most awkward thing that caused me much irritation was the fuel line "quick disconnect" hose elbow that fits onto the high pressure fuel pump. This has four tangs that spring inwards from the inside of the elbow, and they need to be pushed outwards to slide back over a ridge on the fuel pump mounting barb. You can buy special tools for not much money online to do this job (it's an 8mm/ 5/16 hose) but access is ridiculously tight (mine had a maximum clearance of 7mm between the pump and the fitting) and the chances are you won't be able to fit a tool in there. By the time I'd sanded the tool down enough to fit, it wouldn't go in far enough to release the fitting. I eventually found out from a garage that the way to deal with this is using several angled picks (they look like dentistry tools) to force the tabs open whilst an assistant firmly pulls the elbow back. Once you know how, it's not too bad, but as this is easily accessible throughout the job definitely figure out and confirm that you cant sort this step out first before anything else! Most of it can be tackled easily enough with one person, but definitely arrange for a helper for an afternoon to help with engine removal, gearbox separation/re-attachment and engine re-installation Good luck to anyone who gives this a go. As I say although it might seem daunting if you know your way around cars it's doable. I managed it in a long weekend (probably a total of ~20 hours work including figuring out what to do at a few points and having a mate help for a good portion of that time). The car is, thankfully, now running fine.4 points
-
got my vents fitted sunday and must say I am pleased with how they look. all so was in the right place at the right time and got me one of these.
 3 points
 -
cheers for the positive comments guys. I was not to sure at first as once they are in there is no turning back lol but glad I did go for it. yunii they cost me £170 all in and I thought that was a good price if I have any trouble all I got to do is connect the guy that done them and he will sort it out. managed to fit my carbon look mirror covers from paint modz.just before it rained again. just got to fit the washer jets now
2 points
-
The best tip is to fit the MK3.5 (face lift) cooling kit, the details included part numbers are somewhere in the Focus forum. It's not a big job but gets you uprated hoses and a stronger plastic "t-piece". I drove a number of MK3.5 1.0 EBs as hire cars are I really enjoyed driving them, having the turbo means that they don't feel anything like the weedy old school naturally aspirated 1 litre engines of yesterday. On a long run I found I could get very good fuel economy for a petrol.2 points
-
Due to not being able to find any help on this post I thought I would join you all and hopefully help anyone who is having climate control heater problems My mk7 Fiesta with automatic climate control came up with a fault of only blowing cold air through all the temperature settings and what ever I read on Google said the heater resistor. No it's not the heater resistor as that controls the fan speed. This is on right side of the heater by passengers foot (by the passengers right foot is a panel with 1 screw and some clips) Automatic climate control Mk7 Fiestas have 3 actuators fitted due to all the automation and no matter how hard you google there isn't any thing out Right hand dive locations (left hand swap driver and passenger round) all are mounted on the heater unit and Haynes say remove the whole unit 1 actuator is behind the glove box (need to remove the glove box complete 2 pins attach it and its in front of you by the fusebox) this controls the Recirculation flap 1 actuator is by the passengers right leg (again for ease take the glove box out the by the passengers right foot is a panel with 1 screw and some clips it's on the left of the heater) this controls all the flaps for the different vents 1 actuator is by the drivers left leg (by the drivers left foot is a panel with 1 screw and some clips) it's on the right side of the heater but the leg air bag is in the way (I managed to remove the actuator with a torx bit and a 1/4 drive spanner and left air bag in place) this controls the hot / Cold flap this is the one that broke on me Test the actuators by removing the 2 torx screws and operating the relevant control if actuator works then it's the flaps. Mine was the arm that went from the actuator to the hot / Cold Flap. Part number Ford 1827184 £135 and you get all 10 parts to repair all the arms and controls I only needed 1 part or you can buy the whole heater unit, so went to scrap yard with no avail. I then contacted a 3d printing company (Orija Designs, Woodley Berkshire) i gave them the broken arm and 1 day later they called me saying it's ready at a lot less than I was quoted at Ford (a lot less) part fits like a dream and I've got hot / Cold settings I recon all these parts can be made with a 3d printer at less the the quoted price Hope this helps anyone who looks at this post
1 point
-
Off on our jolly to Naples tomorrow in our chavmobile , got 25hrs to get there. Like the stick on bonnet vents?? Lol
1 point
-
I reckon a lot of us can relate to this...
1 point
-
It doesn't matter how careful YOU are...the road is full of people that can't drive. Been stuck in ridiculous amounts of traffic today and passed 3 crashes... It's a bit drizzly, but not cold and there's definitely no ice or snow...honestly can't understand how everyone seems to have forgotten how to drive today! Here's a couple of the crashes... First one is a lorry on it's side...if anyone has been stuck on the A14 or any of Ipswich today, this was the original cause! I hope the driver was alright, will be interesting to know how it happened, load shifted maybe? PS - If the Peugeot driver could keep a constant speed, and not brake to rubberneck the crash, that would've been nice, the van to our left did the same, hence the truck blasting the horn! This one was at a busy crossroads, crash between a Modus and a Golf, can't even really work out how it happened, visibility is fine at this junction. The Golf was a 66 plate!1 point
-
Ordered these on Friday, nice wee touch, colour seems dull but it isn't in the flesh, it's very close to the engine cover. I'll get them on at some point soon
1 point
-
Yeah it looks good with the two tone colour. You did good also masking up the bits 👍. Also you most likely won't notice any imperfections as most likely sunlight won't get in as the bonnet will get in the way.1 point
-
Thanks very much mate. Aye the second last picture had just had a clear coat put on and the photo taken straight away. I cut it beforehand, didn't polish after the last clear coat, I know I should have. It was the first time I had painted something two colours, and I'm happy with the outcome :D1 point
-
I honestly don’t know, I’d like to think that they would at least take it for a decent road test (I.e. not to the end of the road and back). Guess I’ll just have to wait and see. Hopefully yours won’t be too long now as it looks like the part is back in stock Sent from my iPhone using Tapatalk1 point
-
For the benefit of anyone finding this in future... I finally got this done, and without removing the air filter housing. This video - for a Mk3 - mostly shows how I did it, the design is similar if not identical: https://www.youtube.com/watch?v=cUfNFdBEi2E Except I found that with the front panel of the battery box just tilted forward as in the video, there still wasn't quite enough space to get the battery out. Maybe that was just me not wrangling well enough, I'm not sure. What I did was lift out the front panel of the battery box altogether, rather than just tilt the panel forward, and that gave me plenty of room to do the job. To do this, I first had to lift out the cables held in by the hooks on the panel. The one gotcha - after swapping the batteries, when I was clipping the cables back into the front panel of the battery box, I thought I had split the sheathing around the bundle of wires from the fuse box. Then I realised it's actually just a cable tidy to keep the wires together, and it has a split all the way down it. So don't panic and think you need to make it watertight, as I did at that point. No idea why they had to put the battery in such an awkward place, I assumed it would be a trivial job but I wouldn't bother doing it myself in future. At least on the Mk2.5 having the battery disconnected doesn't seem to screw anything up (apart from the radio, which I had the code for anyway).1 point
-
Looks very nice. In the second last picture I noticed a bit of a hazy look where the light was shining on. Did you polish it after? Still the finish and depth of the paint looks good.1 point
-
Engine cover pretty much finished. Just need to get the red pinstripe for the cut out. Pretty chuffed with it, took a long time to get done, but I'd rather it was right than a sight. The colour when fitted is a little off, but that's mainly due to bad light and the flash of the phone camera.
1 point
-
Update from dealer this morning to say that part should be in tomorrow, so with a bit of luck I should have it back by tomorrow afternoon. Sent from my iPhone using Tapatalk1 point
-
They look awesome mate, I must say. Something I'd be weary about getting done, but they look the ticket.1 point
-
As Zain says, you can buy them from pretty much any car parts shop so shop around and see who is cheapest at the time, I found my current set on eBay cheap & unused as the seller had bought the wrong fitting for his car but I never pay full price for anything...1 point
-
that sounds like a good plan. yes got the vents done a very happy with them. just trying to upload pics now as I type.1 point
-
she scrubs up well fair play. what happened to the smoked rear lights?1 point
-
look like the interior came up well1 point
-
looks a nice tidy example you got fella the best colour imo. look forward to seeing any cosmetic changes you do.1 point
-
The DPF needs sorting before it comes out of limp mode. What sort of mileage is on the car and what sort of journeys do you do?1 point
-
All sorted now with a second hand engine. As a warning to others in the future, if you are having issues with rich mixture that don't appear to be lambda related or your stop/start system is sometimes not cutting the engine out cleanly (ours would sometimes refuse to cut-out completely which I reckon in retrospect was due to fuel vapour getting into the combustion chamber from the sump) then I would get the fuel system checked out ASAP and inspect the engine oil for signs of petrol before it does serious damage.1 point
-
I don't like it when the satnav takes you down a lane that gets narrower and narrower and then gets grass growing up the middle. I call that a farm track... Sent from my SM-G900F using Tapatalk1 point
-
Get a Titanium x or at least at Titanium model. The other mk3.5 trim levels will be a bit poorly specced out for someone who currently drives a Jaguar (even though it still won't compare) I vote for the 1 l ecoboost with 125 bhp also.1 point
-
If you are getting 34 mpg - genuine not computer read out - you re getting what I have over 70,000 miles. Obviously, if you do town work only and have heavy right foot the mpg will be probably in middle 20's. Depends how many miles you have covered. Remap would be covered when I take the car for annual service to Ford dealer ( which I do actually even though 13 years old) You bloke may be guessing now as there are variables here. I get what the Ford book says as those days they didn't lie as they do now!1 point
-
Cheers for that, I'll have a good read at it this evening when I get home. Most informative.1 point
-
You need to resolve the problem with the fan first. There is a purple write coming from the plug on the fan. This wire breaks often in the wiring loom that goes from the fusebox in the engine bay usually on the first branch. I can't remember now if it connects in the fuse box or if it goes to the BCM but you can remove the air filter box and trace the loom to check the first branch from the fuse box. Undo the trunking and check for corrosion, especially for a green powder. There should be a lot of topics about this issue. ECU recognise lack of communication with the fan and will not start regeneration cycle so any other repairs will not cure the issue. Tada https://www.fordownersclub.com/forums/topic/94666-ford-s-max-galaxy-radiator-cooling-fan-not-working/ Sent from my iPhone using Tapatalk1 point
-
Codes need to be read as suggested above. Without knowing if it's even petrol or diesel, let alone the engine size, we can't make any educated guesses.1 point


-
Popular Contributors
-
1
 unofix
80 -
2
 TomsFocus
68 -
3
 StephenFord
50 -
4
 DaveT70
28 -
5
 Eric Bloodaxe
19 -
6
 iantt
iantt
13 -
7
 mjt
mjt
12 -
8
 alexp999
10 -
9
 Tizer
Tizer
9 -
10
 troy45
7 -
11
 Jennie
5 -
12
 Alan G H
5 -
13
 stevo666
5 -
14
 alanfp
5 -
15
 rockofgibraltar
4 -
16
 Turvey
4 -
17
 Paulkp
4 -
18
 surfwidow
4 -
19
 Zen23
Zen23
4 -
20
 Jimpster
4 -
21
 willowbob
3 -
22
 nicam49
3 -
23
 YOG
YOG
3 -
24
 dezwez
3 -
25
 Dark Andy
3
-


