Jump to content
Do Not Sell My Personal Information

Shadows Entity's Mk7 Fiesta Zetec S Update 18/04/2015

Shadows Entity
 Share

Recommended Posts

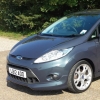
Here is the car as I bought it, got it last month

20140807_093138.jpg

20140807_093147.jpg

Plans are a bit more power and some subtle styling mods

No stranger to modified cars, last car was an octavia mk1 Vrs up to 240bhp and complete suspension overhaul

Progress...

Coming soon.....

  • Like 1
Link to comment
Share on other sites


Well something to update with.


I have replaced the standard filter with a pipercross one which retains the standard top and maf housing to keep it looking oem. Also a silicone pipe to replace the plastic throttle body pipe.


Only thing I dislike about it is the blue silicone bung they supply it with for the crankcase breather... seems like a bit of an after thought.


20140905_154223.jpg


20140905_154209.jpg


Then I went to installing some blue Magnecor HT leads, didn't bother with the red ones for the extra 0.5mm thickness as reviews are sceptical at best as to HT lead upgrading gains other than looks and it just so happens I want a grey and blue theme.


Changed spark plugs to the denso itv16 ones while I was at it


20140905_175034.jpg


Then I went about improving the electrics by adding supplementary earthing points.


So this is the main earthing point on our cars....


20140905_161446.jpg


Seems rather pants as most cars I've had before are straight onto the gearbox then bridge off that so I thought it would benefit from a bit more than just one earth point.


So made up a couple of cables and wrapped them in black insulation tape to keep it oem looking...


20140905_161437.jpg


20140905_163911.jpg


Now as I'm not overly confident with this engine yet as to what does what and what connects where so I only used points that where easy to get to an non invasive.


Good point for the engine block was to undo one of the bolts that connects the engine lifting eye or whatever it's called...


20140905_162030.jpg


Used the thicker cable for that one and this is it in place


20140905_163937.jpg


Then I used the thinner long cable to span from the previous point to a ac pipe clamp


20140905_163943.jpg


Not the greatest picture as the scuttle panel hides it...


20140905_171702.jpg


Then as you can see from the picture above I have another cable coming off that which then connects to this genuine earth point for whatever it is...


20140905_171707.jpg


And then finally one last cable from the beginning position of the main earthing point to this other genuine earthing point


20140905_175048.jpg


And so then finally all done up at the source


20140905_175038.jpg


Whether it makes much of a difference I'm not sure, car does feel better for it and when you turn electrics on when idling the revs don't change as much


Also finally for this update I used a Bluefin on it, so collectively the car is alot more urgent and aggressive than it was standard which is what I wanted smile.png..


Link to comment
Share on other sites

Looks good mate, really like the colour I've not seen many in that colour before.

Sent from my iPhone using Ford OC

Link to comment
Share on other sites

Cheers, yea it's Midnight Sky... Quite a bluey grey but can look other colours in the sunlight

Link to comment
Share on other sites

  • 3 weeks later...

got some stuff ordered on its way, summit front strut brace and rear torsion bar as well as steeda short shifter and upper rear strut brace. Hopefully will add a bit more feel to it

Link to comment
Share on other sites


  • 2 weeks later...

Well so far managed to get the front strut brace fitted... not as easy as it looks.

My top tip is to actually remove the central brace as it's got a bolt either end holding it in place... Then you can get each strut mounting point in place and some extra arm room to get the rear bolts in as they are a poo nugget to get back on.

Leave them all slightly loose then refit the central part and tighten up everything...

Second tip for the rear bolts as the easiest way to do it would be to remove the scuttle panel but in doing so that actually makes it a time consuming thing to do........ So what I did is get my 13mm spanner with a closed end or whatever you call it (complete circle rather than open). Brush on some automotive grease in the circular bit then slot the nut into the spanner... That way you can hold it in the spanner get it onto the thread of the bolt, give it a wiggle so the nut is just sat ontop then hopefully if you've got long fingers and slim hand (not very manly) you can tighten it up with your fingers then get a spanner in to do it properly. Otherwise all that happens is you keep dropping the nut getting it on....

20141007_172017.jpg

Not 100% on verdict as it keeps raining so testing handling isn't the greatest idea but does feel tighter

Also pic of mine and my gf's car :)

Going in for a kiss

20141009_133031.jpg

  • Like 1
Link to comment
Share on other sites

  • 3 months later...

Finally something to update with

So since ages ago I've fitted rallyflapz only to the back so far as not had time to do the fronts and fitted 20mm Eibach spacers to the rear which makes it look wayyy better, fills the arch up and makes it look low without being low.... So still need to space fronts out to match and fit front flaps. Also need some pictures....

What I do have pictures of though is fitting a Steeda short throw shifter. I chose this over the other ones as it was cheaper and offered the most improvement.

Top tip for making it easy to fit use the Mountune guide

http://www.mountune.com/downloads/sts_install_rev1.0.pdf

Having said that I still snapped 2 clips on the shifter surround but luckily it went back on and doesn't move... is it just me or is Ford plastic brittle?

As I had my phone on me for the mountune guide I actually took pictures...

Old one ready to come out

20150201_142700.jpg

Empty

20150201_143306.jpg

Comparison

20150201_143410.jpg

New in place

20150201_144307.jpg

Back together

20150201_145235.jpg

Gear knob is a bit lower down so may look at getting a bigger knob............I have long legs so I have to have the seat all the way back but a short body so I have the seat raised up so it feels like quite a reach now to grasp it. This is sounding dirtier as I go along.... and I'm not a freak not like 2m legs and 30cm body lol anyway........

Also got a nice picture of the car in my work car park

20150202_074102.jpg

0 points for guessing where it is... there's 2 fairly massive give aways

  • Like 1
Link to comment
Share on other sites

  • 1 month later...

So i fitted new Speakers into the rear of the car which is a right kerfufull to put it nicely....

Started off by getting the Speakers sorted fist, i mounted them to the adapters and used foam tape to seal round them. As i wanted to retain the original plugs for retrofit if needs be i cut some wire to connect to the speaker terminals and soldered them in place so they wont come free as i dont want to have to get at them again....

20150220_121852.jpg

To remove the rear panels you have to take out the rear seats completely. Base lifts out and the backs you pull down and use a flat head to prise the latch open either side then they wiggle apart after much effort....

You also have to remove the seat belt loop at the bottom.

20150220_125945.jpg

20150220_125955.jpg

20150220_130005.jpg

20150220_130116.jpg

20150220_130125.jpg

Fords idea of sound deadening... a bag full of foam

20150220_130142.jpg

Got to work with improved sound deadening

20150220_133013.jpg

20150220_133108.jpg

Video difference between oem and my side

http://i46.photobucket.com/albums/f143/alexphantomz/Fiesta%20zetec%20s/th_20150220_133451.mp4

Fitted one side

20150220_141459.jpg

Here is a video, wont call it a guide as no instructions just showing what i did as i couldnt find any vids to help me...

http://s46.photobucket.com/user/alexphantomz/media/Fiesta%20zetec%20s/20150220_130511.mp4.html

Not the most exciting job but if you like your music its worth it.... just a warning be patient Ford seem to use the most brittle and sharp plastic ive ever encountered...

Link to comment
Share on other sites

  • 3 weeks later...

Got this subwoofer the other day for £2.70 with a lucky last second eBay bid

20150314_180953.jpg

Tested it and works, had the garage door vibrating.

At some point I'm going to make a custom enclosure for the boot recess so i dont loose any boot space

Link to comment
Share on other sites

Made some extra lighting for the footwell so it's even brighter and better spread.

20150316_150804.jpg

20150316_154412.jpg

Did this on both sides which are the panels that cover the sides of the gear selector

Then just added them onto existing lights on each side

20150316_152832.jpg

looks much better and brighter now

Link to comment
Share on other sites

An update on Speakers on the front, thought they could do with crossovers for better sound otherwise the tweeter is trying to be a woofer and the woofer is trying to be a tweeter...

Ford made the perfect otherwise useless recess in the door for my crossovers.

Not the greatest but an improvement

20150319_112655.jpg

Result punchier bass clearer voice

Link to comment
Share on other sites

Bought some bits and took to the garage to get creating...

Ive always liked the ambient lighting in the glovebox but didnt want to pay silly money and get it programmed to work...

So i set about the piggyback fuse route with a slight variation

It starts like this...

20150320_163220.jpg

Turns into this...

20150320_164959.jpg

20150321_162437.jpg

Probably overkill but essentially i can now add 3 more things that will all be fused so things will be ok and has 2 fuses to get through if anything happened.

Tested and working

20150321_163739.jpg

Installed and in place

20150321_171912.jpg

Looks amazing cant stop looking at it and dead chuffed as it worked first time when i turned the key.

Used an existing earth point which is conveniently right under the glovebox

  • Like 3
Link to comment
Share on other sites

Looking good, you got any close up pictures of rear spacers? Want to do something with mine. I have seen kits which put spacers behind the rear hub, but assume you used wheel spacers?

Sent from my iPad using Ford OC

Link to comment
Share on other sites


yea just spacers on the hubs

Link to comment
Share on other sites

Did you get them on E Bay or else where? Cheers

Sent from my iPad using Ford OC

Link to comment
Share on other sites

Cheers, found them on E Bay £135. Is that about right price?

Sent from my iPad using Ford OC

Link to comment
Share on other sites

I'm just about 7000 in three months, so won't belong and I'll catch up lol

Sent from my iPad using Ford OC

Link to comment
Share on other sites

  • 3 weeks later...

Well had some fun with the car yesterday and got some bits done that had been sat in my garage for a few months....

So Summit torsion brace and steeda rear upper strut brace.

20150417_114429.jpg

Something usefull I found while looking how best to do it.

zdvihanievozidla.png

So I used the rear centre jacking point with my trolley jack as you need the wheels off to do the upper brace.

Started off with the inside first as it's easier when it's down and means the car isn't in the air for as long...

This is what I did as Steeda's instructions were crap....

Fold seats flat

Remove floor liner

Remove parcel shelf

Remove upper seat belt covers (pulls out)

Remove parcel shelf supports ( 2 screws 1 visible, 1 hidden by seat belt cover and pulls out)

Pull carpet surrounds off the sides which after you've done the above are still held in place by the ring that the seats clamp into and the centre rear plastic that covers the boot lock/catch... You can carefully pull these out without having to remove more plastics.

That's the inside sorted...

20150417_113421.jpg

what's this? looks like a siren?

20150417_113430.jpg

Wheels off and also a picture of my rear spacers fitted as someone asked about them a while ago

20150417_120255.jpg

Now after the wheel is off there is more removal which Steeda missed half off....

You need to remove the arch liner

No mudflaps... easy. Have mudlfaps... twice the effort.

So I had to remove my rallyflapz and bracket as it goes through the arch liner

Then there are 5 or 6 push fit screws... Steeda said 3. I used plyers and unscrewed them off. There's 3 obvious and some hidden around the edges.

Then the arch liner will just pull out.

After that you remove and replace one bolt at a time with the extended ones

20150417_121633.jpg

I took this as a chance to get some tetroseal out as it'll help sound deadening and protect it for longer

Looks a bit disgusting when you put it on

20150417_124720.jpg

20150417_124727.jpg

So extra long bolts poking through

20150417_124849.jpg

Spacers on bolts

20150417_124905.jpg

Picture of my car in the 1960s garage designed for cars a lot slimmer... Only fits in with mirrors pushed in

20150417_134515.jpg

Brace in place

20150417_144133.jpg

20150417_144142.jpg

20150417_144151.jpg

Then this is how it looks and also a picture of my mega lit boot at night....

20150417_202639.jpg

I haven't got a picture of the Summit brace fitted but essentially if you look at the top jacking point diagram it goes on the centre rear point so I had to crawl under the car to do it... Luckily my car isn't lowered so I could do it without it being lifted, just a bit cramped though.

End result, car feels amazing day well spent :)

  • Like 1
Link to comment
Share on other sites

Got a new pressure washer today and had a go with snow foam for the first time... Got a Nilfisk Titan from argos as I had a £7 off voucher and my GF's store discount so got it for £82 with all the attachments :) also got autobrite snow foam lance and using chemical guys pink stuff as thats all i had and says it can be used as snow foam.

20150423_171603.jpg

20150423_171049.jpg

Made a few school boy errors like using it neat which would be very expensive and was getting used to spray and density

Link to comment
Share on other sites

Latest Deals

Ford UK Shop for genuine Ford parts & accessories

Disclaimer: As the club is an eBay Partner, The club may be compensated if you make a purchase via the club

Join the conversation

You can post now and register later. If you have an account, sign in now to post with your account.

Guest
Reply to this topic...

×   Pasted as rich text.   Paste as plain text instead

  Only 75 emoji are allowed.

×   Your link has been automatically embedded.   Display as a link instead

×   Your previous content has been restored.   Clear editor

×   You cannot paste images directly. Upload or insert images from URL.

 Share


×
×
  • Create New...

Forums


News


Membership