Guest Posted February 4, 2018 Share Posted February 4, 2018 Thanks! Yeah id appreciate that, trying to do as much as I can myself without taking it to a garage unless it engine upgrades. - Definitely looked into the shorter aerial is it an easy fix? Ive never actually used radio, always use Spotify on my phone lol. - Any links to the gel badges? - Yeah seen the diffuser just wondering how hard it is to fit it! Tape link is here mate: https://www.amazon.co.uk/dp/B0042XXM8S/ref=pe_3187911_189395841_TE_3p_dp_1 Yeah simple swap bud, I've got to get a new one as the richbrook one I put on has terrible reception.I'm the same always using Spotify but like the option of the radio to be there just incase.Heres the link to the gel badges:https://m.ebay.co.uk/itm/FIESTA-ZETEC-S-ST-MK7-MK7-5-RED-S-ON-BLACK-SIDE-WING-BADGE-YEAR-2009-UP/273005651797?_mwBanner=1Yeah the rear diffuser isn't as simple as i thought it would be, not a straight swap. There was a step by step thread on here by a guy but can't remember his name. Will try to find it.Just ordered that tape too, cheers for the link mate. Quote Link to comment Share on other sites More sharing options...
Gommy Posted February 4, 2018 Author Share Posted February 4, 2018 27 minutes ago, zain611 said: Yeah that's true I forgot about the red and black look. I've started doing the halos finally. Hopefully will post about it in the evening Yeah im trying to keep it Red & Black unless its a sticker, but il see with the headlights, How did the Halos go? Quote Link to comment Share on other sites More sharing options...
Gommy Posted February 4, 2018 Author Share Posted February 4, 2018 23 minutes ago, Loftie12 said: Yeah simple swap bud, I've got to get a new one as the richbrook one I put on has terrible reception. I'm the same always using Spotify but like the option of the radio to be there just incase. Heres the link to the gel badges: https://m.ebay.co.uk/itm/FIESTA-ZETEC-S-ST-MK7-MK7-5-RED-S-ON-BLACK-SIDE-WING-BADGE-YEAR-2009-UP/273005651797?_mwBanner=1 Yeah the rear diffuser isn't as simple as i thought it would be, not a straight swap. There was a step by step thread on here by a guy but can't remember his name. Will try to find it. Just ordered that tape too, cheers for the link mate. Okay, il get the aerial sorted! Thanks, ordered them as i saw another Fiesta with them, looks smart so they're ordered. Yeah I did see but all the photos have gone, is something I wanted to do! Quote Link to comment Share on other sites More sharing options...
zain611 Posted February 4, 2018 Share Posted February 4, 2018 21 minutes ago, Gommy said: Yeah im trying to keep it Red & Black unless its a sticker, but il see with the headlights, How did the Halos go? Here's a picture. There so bright my phone camera couldn't get the halo shape. My dad's phone managed to pick it up. Quote Link to comment Share on other sites More sharing options...
Gommy Posted February 4, 2018 Author Share Posted February 4, 2018 7 minutes ago, zain611 said: Here's a picture. There so bright my phone camera couldn't get the halo shape. My dad's phone managed to pick it up. Looking good! I wanna get them done for mine but needs extra wiring and bezels apparently, Sounds too complicated for me! Quote Link to comment Share on other sites More sharing options...
zain611 Posted February 4, 2018 Share Posted February 4, 2018 Just now, Gommy said: Looking good! I wanna get them done for mine but needs extra wiring and bezels apparently, Sounds too complicated for me! My dad does all the wiring work. Yeah to me it looked complicated plus the HID wires get a little fiddly Quote Link to comment Share on other sites More sharing options...
Gommy Posted February 4, 2018 Author Share Posted February 4, 2018 28 minutes ago, zain611 said: My dad does all the wiring work. Yeah to me it looked complicated plus the HID wires get a little fiddly Thinking of getting these: https://autobeam.co.uk/products/led-h11-ambient-fog-unit?variant=36327854737 Just wondering how il hide the wiring. Quote Link to comment Share on other sites More sharing options...
Guest Posted February 5, 2018 Share Posted February 5, 2018 OK so here's a little step by step. I haven't removed the headlight for this but will give you an idea, it is pretty straight forward to be honest mate.(I don't know how these pictures are going to lay out as I'm doing it off my phone so I'll number them) All you need is a flat head screwdriver, a philips screwdriver, cleaning wipes to get off dirt and grease and finally a dry cloth of some sort, such as a microfiber. Step 1:Open the bonnet (obviously haha) locate the 3 screws securing the headlight (picture 1) and undo. Two main screws can be undone with a flathead and then the smaller screw at the front with a philips (pictures 2 and 3). Take note of the front bracket where the philips screw comes out too and how the headlight bracket slots underneath a plasic lip of the front bumper. Don't get mixed up with resting the bracket on top when you reinstall the headlight. Step 2:Once the screws are out there is one more component securing the headlight. It's a white clip underneath the headlight (picture 4). To release, first lift up the headlight from the rear (nearest the windscreen) and gently prise the headlight up. You'll hear a loud snapping noise but don't panic it's just the clip releasing. Once that has release you'll have room to unclip the plug for the lights (picture 5).Last little point to make is that there are 2 small glass lips which is part of the glass headlight lens that slots under the brow of the bumper when the headlight is installed. It's around the area marked on (picture 6). You need to make sure that is slotted back in when reinstalling the headlight. Found a picture online that shows them (picture 7)And that's it, the headlight is free. Step 3:Once the headlight is out, give the glass a good clean and wipe over with the cloth and it's ready to apply the eyebrows. ** Get an idea of how to place it first before taking the backing paper off the 3m strips. Step 4:Reinstall the headlight making sure you slot the front bracket under that lip of the bumper, and also insure the glass lips slot back under the headlight area of the bumper. Make sure the bottom of the headlights slot back in to the white clips too as they have room to move about on the bracket they are mounted on. Lastly pop your screws back in and job done. Hope that helps out bud, an issues or confusion just give me a shout. Quote Link to comment Share on other sites More sharing options...
Gommy Posted February 5, 2018 Author Share Posted February 5, 2018 2 hours ago, Loftie12 said: OK so here's a little step by step. I haven't removed the headlight for this but will give you an idea, it is pretty straight forward to be honest mate. (I don't know how these pictures are going to lay out as I'm doing it off my phone so I'll number them) All you need is a flat head screwdriver, a philips screwdriver, cleaning wipes to get off dirt and grease and finally a dry cloth of some sort, such as a microfiber. Step 1: Open the bonnet (obviously haha) locate the 3 screws securing the headlight (picture 1) and undo. Two main screws can be undone with a flathead and then the smaller screw at the front with a philips (pictures 2 and 3). Take note of the front bracket where the philips screw comes out too and how the headlight bracket slots underneath a plasic lip of the front bumper. Don't get mixed up with resting the bracket on top when you reinstall the headlight. Step 2: Once the screws are out there is one more component securing the headlight. It's a white clip underneath the headlight (picture 4). To release, first lift up the headlight from the rear (nearest the windscreen) and gently prise the headlight up. You'll hear a loud snapping noise but don't panic it's just the clip releasing. Once that has release you'll have room to unclip the plug for the lights (picture 5). Last little point to make is that there are 2 small glass lips which is part of the glass headlight lens that slots under the brow of the bumper when the headlight is installed. It's around the area marked on (picture 6). You need to make sure that is slotted back in when reinstalling the headlight. Found a picture online that shows them (picture 7) And that's it, the headlight is free. Step 3: Once the headlight is out, give the glass a good clean and wipe over with the cloth and it's ready to apply the eyebrows. ** Get an idea of how to place it first before taking the backing paper off the 3m strips. Step 4: Reinstall the headlight making sure you slot the front bracket under that lip of the bumper, and also insure the glass lips slot back under the headlight area of the bumper. Make sure the bottom of the headlights slot back in to the white clips too as they have room to move about on the bracket they are mounted on. Lastly pop your screws back in and job done. Hope that helps out bud, an issues or confusion just give me a shout. Appreciate that!! Thank you mate. Saw a YouTube video but he never showed the clips or anything. Hopefully they should be here by next Friday the latest and will give you a shout. thanks again! Quote Link to comment Share on other sites More sharing options...
dansallis Posted February 6, 2018 Share Posted February 6, 2018 On 2/4/2018 at 6:12 PM, Loftie12 said: Yeah simple swap bud, I've got to get a new one as the richbrook one I put on has terrible reception. I'm the same always using Spotify but like the option of the radio to be there just incase. I too do not use the radio much, so I bought a new 'stubby' aerial and have had no problems with it. It was a cheap fleabay one: https://www.ebay.co.uk/itm/CAR-BEE-STING-STUBBY-SHORT-BLACK-CARBON-FIBRE-AERIAL-ARIEL-ARIAL-MAST-ANTENNA/222512297851 The radio works perfectly! (Untested in rural areas). Quote Link to comment Share on other sites More sharing options...
Gommy Posted February 6, 2018 Author Share Posted February 6, 2018 3 hours ago, dansallis said: I too do not use the radio much, so I bought a new 'stubby' aerial and have had no problems with it. It was a cheap fleabay one: https://www.ebay.co.uk/itm/CAR-BEE-STING-STUBBY-SHORT-BLACK-CARBON-FIBRE-AERIAL-ARIEL-ARIAL-MAST-ANTENNA/222512297851 The radio works perfectly! (Untested in rural areas). I have mine coming tomorrow so will hopefully get it done then! Quote Link to comment Share on other sites More sharing options...
Guest Posted February 6, 2018 Share Posted February 6, 2018 Appreciate that!! Thank you mate. Saw a YouTube video but he never showed the clips or anything. Hopefully they should be here by next Friday the latest and will give you a shout. thanks again! No problem at all mate Quote Link to comment Share on other sites More sharing options...
Gommy Posted February 6, 2018 Author Share Posted February 6, 2018 Just applied two more stickers and the 3mm tape and for £2.. what a difference that tape makes! Will get pictures... once it stops snowing!! Quote Link to comment Share on other sites More sharing options...
Gommy Posted February 6, 2018 Author Share Posted February 6, 2018 While I’m waiting for a guy to show up from Facebook to buy a Eibach suspension kit. the stickers, the effect does look much better than the pictures shows: will get pictures of the red tape tomorrow. 1 Quote Link to comment Share on other sites More sharing options...
Gommy Posted February 6, 2018 Author Share Posted February 6, 2018 Quick update: just got the springs home. Saturday I’m going to NKE Performance to get the springs added to lower the car, the blow off valve fitted and both top induction and secondary hose pipes, they’re also replacing the reflector too. will be plenty of pictures after Saturday morning! 1 Quote Link to comment Share on other sites More sharing options...
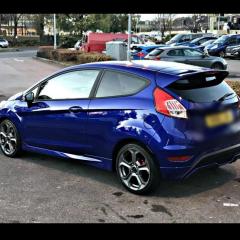
Gommy Posted February 7, 2018 Author Share Posted February 7, 2018 Update. Aerial added: Tape added: just a decent photo I thought: Something I saw on the Fiesta page, that I wanted done: 2 Quote Link to comment Share on other sites More sharing options...
Gommy Posted February 8, 2018 Author Share Posted February 8, 2018 Top induction pipe, secondary hose and blow off valve have arrived. ———— will hopefully get the hose & pipe fitted tonight.Then Saturday it’ll be lowered and blow off valve fitted. Quote Link to comment Share on other sites More sharing options...
jleggett26 Posted February 8, 2018 Share Posted February 8, 2018 Have you got any videos of your exhaust I’m thinking of getting one and would you say the loud Quote Link to comment Share on other sites More sharing options...
zain611 Posted February 8, 2018 Share Posted February 8, 2018 9 minutes ago, jleggett26 said: Have you got any videos of your exhaust I’m thinking of getting one and would you say the loud Check out Zaustworx on Facebook. They have a video of the same exhaust fitted on the 1 litre ecoboost fiesta. Quote Link to comment Share on other sites More sharing options...
jleggett26 Posted February 8, 2018 Share Posted February 8, 2018 13 minutes ago, zain611 said: Check out Zaustworx on Facebook. They have a video of the same exhaust fitted on the 1 litre ecoboost fiesta. Yh I’ve seen that video just wanted to hear some other videos of it and to know if it is loud 1 Quote Link to comment Share on other sites More sharing options...
Gommy Posted February 8, 2018 Author Share Posted February 8, 2018 Quick Update, decided to do the pipes myself, and god what a difference in noise, top induction and secondary hose finally done. Photo of new pipes: Videos of new engine noise: https://streamable.com/yus8h https://streamable.com/ibnuv The videos really dont do the noise justice, its a lot louder in person. --- PS. You can kind of hear the exhaust but I will get an exhaust video but neighbours complained about noise lol. Quote Link to comment Share on other sites More sharing options...
Gommy Posted February 8, 2018 Author Share Posted February 8, 2018 2 hours ago, jleggett26 said: Have you got any videos of your exhaust I’m thinking of getting one and would you say the loud Yeah alot louder than most, also creates a few pops and bangs now and again. Quote Link to comment Share on other sites More sharing options...
Guest Posted February 9, 2018 Share Posted February 9, 2018 Quick Update, decided to do the pipes myself, and god what a difference in noise, top induction and secondary hose finally done. Photo of new pipes: Videos of new engine noise: https://streamable.com/yus8h https://streamable.com/ibnuv The videos really dont do the noise justice, its a lot louder in person. --- PS. You can kind of hear the exhaust but I will get an exhaust video but neighbours complained about noise lol. Looking good mate.You got any pipes leading from the front to you induction? Just wondering about the induction sucking in warm air from the engine bay. Quote Link to comment Share on other sites More sharing options...
Gommy Posted February 9, 2018 Author Share Posted February 9, 2018 41 minutes ago, Loftie12 said: Looking good mate. You got any pipes leading from the front to you induction? Just wondering about the induction sucking in warm air from the engine bay. Thanks! No mate, the one I bought never came with any extra pipes and every picture I’ve seen with that setup has it like that? Quote Link to comment Share on other sites More sharing options...
b4zz Posted February 9, 2018 Share Posted February 9, 2018 looking and sounding great fella 1 Quote Link to comment Share on other sites More sharing options...


Recommended Posts
Ford UK Shop
Sponsored Ad
Name: eBay
Ford Model: FordUK Shop
Ford Year: 2024
Latest Deals
Ford UK Shop for genuine Ford parts & accessoriesDisclaimer: As the club is an eBay Partner, The club may be compensated if you make a purchase via the club
Join the conversation
You can post now and register later. If you have an account, sign in now to post with your account.